The construction of a winter greenhouse with your own hands is a rather difficult affair, but for everyone.
Such a greenhouse will delight its owner with fresh products throughout the year and regardless of weather conditions.
Further in the article we will talk about how to heat and heat a polycarbonate greenhouse in winter, spring and autumn, how to make a winter polycarbonate greenhouse with heating, which heater is better (ovens and infrared heating) and other heating nuances.
Polycarbonate year-round greenhouses
Polycarbonate panels - one of the best materials when creating greenhouses, including year-round. This material is quite durable and not subject to the destructive influence of the external environment (for example, temperature drops, high humidity).
At the same time, it is very convenient to work with such material - it is mounted on the frame of the greenhouse with the help of screws, it bends well.
The most important advantage of such greenhouses - It is an opportunity to use it all year round, all the time to grow plants and receive fruits. It can be a variety of greens, and other vegetables.
Installing all the necessary systemsYou can create inside any necessary temperature conditions. In addition, such a greenhouse does not need to be cleaned after each season.
What should be the greenhouse?
 All greenhouses have a similar principle of operation. Winter greenhouses have some features that must be observed during construction.
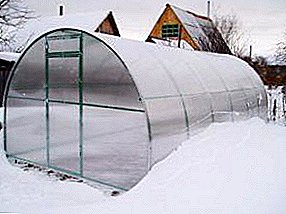
Winter polycarbonate greenhouse - stationary and requires the creation of a high-quality foundation and durable frame.
A prerequisite for creating a year-round greenhouse is a capital foundation. The wooden foundation will not work, because it must be periodically changed.
The best option - This is a foundation of concrete, brick or block. Ribbon foundation is created around the perimeter of the structure, is quite simple to install and at the same time relatively inexpensive.
The second important point is the frame of the greenhouse. Use in the wintertime involves periodic snowfall. The accumulation of snow on the roof leads to very heavy loads on the frame, which can lead to the destruction of the entire structure. The frame can be made of wood or metal.
Preparation for construction
In the network you can find a lot of ready-made solutions for the construction of greenhouses and adapt them to their needs. You can also create your own drawing based on your needs and wishes.
Exist special programs to create drawings. They allow you to see the finished layout of the future structure.
In any case, when creating a greenhouse with your own hands, you need to pay attention to several factors.
First you need to choose a place. for further construction. You need to choose based on three main factors:
- Illumination. Greenhouse should receive the maximum amount of solar energy.
- Wind conditions. Strong and gusty winds are not only the risk of structural collapse, but also large heat losses. Therefore, a windshield is needed. For example, you can place a greenhouse near the wall of the house or plant low perennial plants at a distance of 5-10 meters.
- Convenience. Access to the heifer should be wide enough and convenient, which will greatly facilitate the maintenance of the building.
To obtain the maximum amount of sunlight the greenhouse can be placed along the length from west to east.
 Then need choose the shape of the roof future building. Most often it is a gable or arcuate roof.
The shape of the roof should counteract the accumulation of snow during the cold season. The gable roof is the easiest to install.
Is also important frame material. The most durable and durable material is metal.
But it is important to remember that the creation of a metal frame will require welding for the construction of the structure. On the other hand, the tree does not require special tools or skills, it is very accessible.
Also worth saying about the choice of polycarbonate. What is the required thickness of polycarbonate for the winter greenhouse? If an ordinary thin sheet (6-8 mm) is suitable for an ordinary greenhouse, then for winter greenhouses panels with a minimum thickness of 8-10 mm are needed. Otherwise, there is a risk that the panels will not withstand the load, and the heat will be poorly maintained inside the building.
One of the key features of winter greenhouses is heating system. What kind of heating in winter polycarbonate greenhouses to choose? How to make heating in a polycarbonate greenhouse in the winter with your own hands? How to heat and insulate a polycarbonate greenhouse with your own hands for the winter using furnace heating?
Heating with electrical appliances, such as infrared heaters, is becoming increasingly popular. How to arrange the heating of polycarbonate greenhouses with infrared heaters?
It is very easy to install such a system - you only need to carry the power grid to the greenhouse and connect the electrical appliance. Need to spend money on the heater itself and electricity.
Infrared heaters for a greenhouse made of polycarbonate, they are installed on the ceiling and are capable of providing air temperature inside up to 21 degrees Celsius, and soil temperature up to 28 degrees.
The alternative is old and traditional. stove heating method.
It is much cheaper and easier to install. However, its disadvantage is the strong heating of the walls, it will not be possible to grow plants near it.
Finally, the foundation of the whole building must be made capital and sustainable, because the strength of the whole structure depends on it. Its creation does not require any complex actions and can be done by everyone.
Construction work must be carried out in dry weather with a positive temperature.
Instruction
 How to build a winter polycarbonate greenhouse with your own hands?
- Foundation creation.
- Frame Mounting.
- Installation of communications.
- Installation of polycarbonate panels.
For stationary greenhouses will be optimal strip foundation. To install it, it is necessary to dig a trench about 30-40 cm deep along the perimeter of a future building. A small layer of gravel and small stone (5-10 cm thick) is poured at the bottom. Then the entire trench is poured with a layer of concrete.
When creating a mortar, the best quality will be provided by a mixture of one part of cement and three parts of sand.
After the solution has frozen proceed with the installation of the next layer. A layer of waterproofing is laid on the foundation layer (roofing material is suitable). Then the greenhouse base is formed. A wall of small height is laid out of bricks. Enough wall thickness of one brick. For the construction of suitable not only new, but already used brick.
After creating the base and the complete solidification of the solution, you can proceed to the installation of the frame.
The most simple and affordable option creating a frame is a frame made of wood. For its installation does not require special knowledge or skills, as well as welding. It is important to pre-prepare the wooden elements before installation.
First you need to clean the elements from dirt and adhering soil with a brush, then sanding with fine sandpaper. Then rinse with running water and allow to dry completely.
After that, you can proceed to the application of paint coatings. Best suited paint for exterior work, resistant to high humidity and different temperature conditions. After the paint has dried, you can apply a couple of layers of varnish on top.
Now, a timber with a section of 100x100 mm is installed along the perimeter of the foundation. To create a roof, you can use a timber with a cross section of 50x50 mm. When constructing the roof, it is necessary to prevent areas without support more than 1 meter. Also along the ridge you need to arrange several props for additional reinforcement of the structure.
To achieve maximum strength, you can also create a trim from the boards.
The elements are fastened with screws and a metal tape.
You can add a small tambour at the entrance to the greenhouse. This will reduce heat loss during entry and exit to the greenhouse.
The next stage is associated with installing a heating system, lighting and other necessary communications.
Lamps are installed along the ridge of the roof, sufficient to illuminate the entire room. For convenience, all switches are best placed near the entrance.
When installing stove heating chimney is held. It is important to remember that the chimney pipes are very hot during operation of the furnace and can melt the polycarbonate panels.

The final stage of creating a winter greenhouse - This is the installation of polycarbonate sheets. The sheets are fastened together with the help of an H-shaped profile. From the ends on the panel is mounted U-shaped profile. The sheets themselves are set vertically, then moisture flows better through them.
Do not mount sheets too hard. Polycarbonate expands when heated, and too rigid installation can cause cracks.
Polycarbonate fixed with self-tapping screws with a sealant. The seal prevents moisture from penetrating through the holes. Before installation, holes with a diameter slightly larger than a self-tapping screw are made on the sheets. Between the frame and panels fit a special tape for sealing.
After this greenhouse ready for operation.
Creating a winter greenhouse is somewhat more complicated than usual, but it is within everyone’s power and does not require special skills.
Tips on building a heated polycarbonate greenhouse with your own hands.


