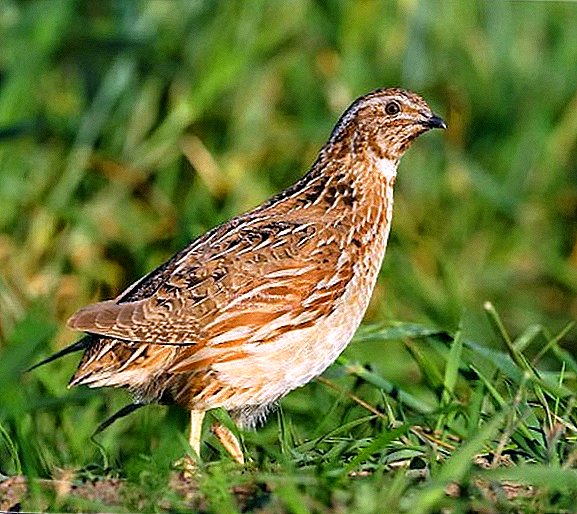
Quail is a bird from the subfamily Kuropatkov. The length of an adult bird is about 20 cm, and its weight is 150 g. Females and males differ in color. Male has dark-red cheeks and red goiter. The female has a pale ocher chin and black spots on the sides and lower part of the body. Breeding quails at home or in the country is an alternative to chickens, which means chicken eggs and meat. If you decide to breed a small number of quails, then even your apartment will do. Keeping quail is no more difficult than any other domesticated bird.
Did you know? Workers fed the quail meat during the construction of the pyramids.
Why bred quail
 Interest in breeding quails originated in ancient China. The Chinese believed that this is a source of nutrition and valuable ingredients for healing potions. Breeding quails then became popular in Japan. It was Japanese scientists who proved the usefulness of quails as a food product. At the moment, quails are bred both for their own consumption and for business. Eggs and carcasses are now expensive, and organic fertilizer for the garden is made from bird dung.
If you have enough time to care for quails, you will have to invest a small amount of money in them, but the result will be quite profitable. In addition, it should be noted the high rate of production of products of quail. Eggs quail at home begins at about 1.5 months. For the year from one quail you can get about 330 eggs.
Did you know? The quail has received its name due to its coloring and ability to crouch to the ground in danger.
Room and cage for quail
The optimum room for quail should be warm. Depending on the number of birds, either exhaust ventilation or intake ventilation should be installed. You also need to respect the optimum temperature. The temperature should not be higher than 25 ° C or lower than 12 ° C, as the bird will cease to run well. In hot weather, quails can lose feathers, and at low temperatures they can die.
If you are new to quail breeding, we recommend that you buy a special cage to keep them. If you are already a more experienced quailler, you can try making a cage with your own hands.
Quails must be properly contained in the cells, so we present you a list of requirements for the room:
- The height of the cage should not be more than 20 cm. Quails often jump up and can sometimes be injured.
- The cage should have a special tray for receiving eggs, and also should have a special capacity for litter. This will reduce the risk of disease and pollution of quails. The tilt angle for assembling eggs should be approximately 10 °.
- The main elements of the cage should be made of galvanized mesh and metal.
- Bird landing area should be approximately the same - 10 birds per 0.2 sq / m.
- The size of the cage should be 100 cm by 40 cm. For quails, which then go for meat, the dimensions should be 5 cm larger.
- The height of the back wall should be about 20 cm, and the front one should be 25 cm. The front wall is also a door. It is better to fix the wire.
 This instruction for creating a cage for young quails will help you create your own incubator. By the time the cell can be assembled in 2-3 hours. The main material for the quail cell is galvanized steel mesh. The blank for the cage has such dimensions - 105 x 70 cm.
Two side walls (billets) with a size of 30 x 30 should be cut out of this grid. They should be bent in this way: the height of the front wall should be 16 cm, and the back one should be 14 cm. The width of both walls should be 30 cm. The end walls of the cage can be fastened with plastic clamps. The end of the egg collector should not be higher than 3 cm. A fine mesh should be put on the bottom of the cage. On the side wall should cut the door and attach it to the wire.
The side walls of quail cells can serve as both an exit and a necessary space for the collection container. It can be made of plywood or wooden slats. After creating a litter collector, it should be treated with an antiseptic, as over time it can produce an unpleasant smell, even when it is empty.
Did you know? Quail egg will never spoil, as it contains lysozyme, a useful amino acid that does not allow the microflora to develop.
Lighting
 To grow quails at home you also need to adhere to and proper lighting. Lighting does not require large costs. If you have a 4 x 4 cell, then a normal 40 watt lamp will be enough for it. You can also use energy-saving fluorescent lamps. For quail, you need to create both day and night. Some quails do not turn off the light at all, thinking that the birds will better ride. At the first stage, quails can carry more eggs, but the bird will quickly get tired of it. It is also impossible to do darkness for more than two hours. Because of the rapid metabolism, quails feel hunger. And if you create a night for 4 hours in a row, the bird will be very hungry and can eat more than normal food. This can lead to blockage of goiter.
We offer the following lighting schedule for quails:
- From 2 to 4 in the morning should be light.
- From 4 to 6 it is better to turn off the lamp.
- From 6 to 24 lamps must be turned on.
- From 24 to 2 nights should be dark.
Important! The night for quails should last no more than 4 hours. Better to break this time for 2 hours.
For egg production, the following lighting mode is required: the light turns on from 6 to 23 hours. This is the perfect mode for getting your hatching eggs. When growing quails for fattening, you need to follow another mode: the light regime for males should be 10 hours, and for females - 12 hours. If you keep quails of both sexes - 11 hours.
Did you know? The image of a young quail in ancient Egypt served as a hieroglyph and meant the sounds "in" and "u".
Quail Egg Incubation
 The previous instructions for creating cages are designed for growing adult birds; for young quail, you need to buy an incubator. Incubators come in different types of designs, but they must be equipped with a thermostat and be insulated. You also need an automatic egg flip, but you can do it yourself.
We recommend growing a small number of quails, as it is easier to work with them. You can use household incubators, which are designed for 280 eggs. Do not count on the fact that if you lay 100 eggs in the incubator, then the same number of chicks will appear. The development of the embryo may not go as smoothly as it should be, that is, only about 75% of the chicks hatch healthy.
Before laying the eggs in the incubator, you need to prepare it. Water should be poured into the tray. This tray is under the eggs. Above the water tank is a grid. Quail eggs are laid on it.
We proceed to the selection of eggs for incubation:
- The mass of breeding birds should be 15 g.
- The mass of poultry that goes for meat - 13 g.
- Form index - 70%.
- The absence of shell defects, ie irregularities or growths.
- The surface must be matte.
Eggs also need to be scanned through the ovoscope. So you can determine if there is blood in the eggs. Also, the yolk and protein should not be mixed. By means of an ovoskop it is possible to determine the wrong location or size of the airbag.
First stage The incubation lasts only two days. This is a period of calm. The optimum temperature at this stage is 37.7 ° C. Humidity should be 70%. Eggs need not be ventilated and turned over.
 Second phase, which lasts 13 days, is called the period of active growth. Temperature and humidity should be the same as in the first stage. On the third day of incubation, you can begin to turn the eggs. Turning from 3 to 15 days is necessary in order to avoid the embryo from drying to the shell. You need to turn the eggs 6 times a day, if you do not have an automatic coup in the incubator.
Third stage incubation is called excretory. The temperature should be approximately 37.5 ° C, while the humidity should be increased to 90%. Two days before hatching eggs do not need to turn and spread them more freely. Also in recent days you can spray the eggs from the spray. After the chicks were born, they need to be transplanted into a disinfected and heated brooder. This will help them dry out and warm up faster.
Keeping and feeding the young
Breeding quail at home also includes proper care and feeding of young chicks. The first days of the feeders and drinkers should be inside the cage. A week later, they are placed outside the cell. Mesh floor need to cover with paper and every day to change the top sheet.
 The temperature should always be around 37 ° C, since quails are sensitive to cold at this time. On the second week the temperature should be 32 ° C, and on the third - 26 ° C. Subsequently, the temperature should be 24 ° C. Also need to adhere to the light mode. The first two weeks should provide constant quail coverage. When quails grow to six weeks of age, coverage should be reduced to 17 hours.
For daily quail you need to adhere to a certain schedule of food and feed. We recommend taking special food for small quail. It should be fresh and suitable for babies from the first days. All manufacturers feed for quail called "Start." Use it for broilers, as a separate feed for quails do not produce.
This feed is very large for small chickens, so it is necessary to grind and feed them for the first 4 days. In the first week you need to fill each chick with about 4 g of feed per day. You can put it on a napkin or rag. On the second and third day you can use the feeders. A little later, you can put the usual.
 They can also be covered with a fine mesh so that quails can safely take food and not climb on them. From the first hours of life chicks need water. Drinking bowls should not be used for the first time, it is better to put ordinary jars with vacuum tanks. You can also take special drinkers for quail. In the second week, the feeders can be replaced by grooves. Their sides are bent inward. Feed them often and even at night. It is better to fill the feeders at 2/3 of the depth.
The daily ration for young quails should include approximately the following components:
- Corn. On one quail should fall about 40 grams per day.
- Wheat - 8.6 g
- Wheat bran - 5 g.
- Sunflower meal - 10 g.
- Fish meal - 35 g.
- Feed yeast - 3 g.
- Meat and bone meal - 5 g
- Grass meal - 1 g.
- Mel - 1 year
- Premix - 1 g (P-5-1).
- Salt - 0.4 g
- Dry reverse - 2 g.
As a result, one quail needs to be given 100 g of each of the ingredients from this list every day. All this can be mixed with food. For one chick in the first week you need to allocate about 4 g of feed. By the age of one month, the daily feed consumption increases to 16 g.
Quail care
 Studying the question of how to breed quail at home, do not forget about the features of care for this bird. Quails are unpretentious to care, but, so that productivity does not decrease, it is necessary to maintain the correct temperature and light conditions, as well as proper feeding. Growth, development, productivity, health and reproduction of quail depends on the light mode. A day for them should last up to 20 hours. Twenty-four-hour lighting increases egg production, but quails often turn out to be hungry, and the productive period is shortened. At daylight hours, until 17 o'clock, egg production is reduced due to lack of food.
Important! You can not use bright lighting at home, as the birds can peck at each other from hunger.
The optimum temperature for quails is 22 ° C. In winter, the temperature should not fall below +10 ° C. Humidity should be kept at 70%. To prevent infection by various diseases, the cell must be cleaned regularly. Especially need daily cleaning litter. Once every three months it is necessary to carry out disinfection and general cleaning of the cage.
Quails need to be transplanted to another place and wash the cage with a hot solution of washing powder. Dirt is well cleaned with a brush. Then the cell is rinsed and dried. To save quails from ectoparasites, they need to be bathed once a week in large river sand.
Important! To hold such an event is necessary for quails not younger than three weeks of age.
Feeding adult quail
 Quail after breeding and rearing need to be properly fed. In the feed for laying hens there must be nutrients such as protein, fats, carbohydrates, vitamins and trace elements. Also in the feed should be present protein, about 26%. When egg-laying, crushed eggshells should be added to the feed. Per day one hen is needed up to about 30 g of feed.
Important! If there is not enough grain in the feed, quails cease altogether.
You can also make food for quails with your own hands.
It should contain the following components:
- Vegetable (beets, carrots, cabbage and potatoes).
- Mineral (chalk, shell, yeast).
- Animal products (cottage cheese, sourdough, reverse, egg white).
Vitamin supplements such as greens, oilcake and grass meal should also be added to the feed.
Did you know? Quail eggs treat anemia, are useful for severe headaches, sensitivity to acute respiratory infections, chronic amnesia, ulcers and gastritis.
Fattening quails before slaughter
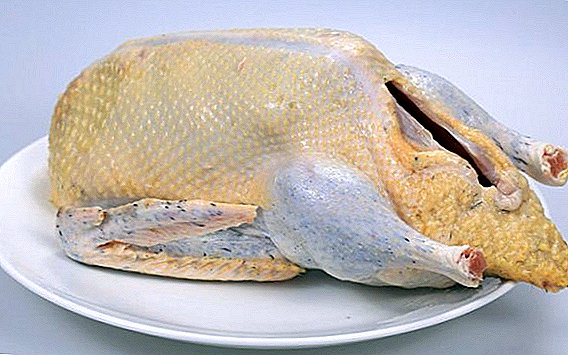
 Males and females with physical defects are taken to fatten quails for meat. You can also take the young that are grown for this purpose, and quail after the laying of eggs. Such feeding is introduced gradually, as a sharp transition can lead to the death of the bird. Such a transition must be done in 4 days. Quails for meat are placed in a cage with solid walls in a shaded place. It is advisable to keep the females and males separately. Feeding should be the same as for an adult quail, only the amount of fat and corn should be increased.
On the first day, half the old food and half the new will be given. This fattening lasts about 4 weeks. In the last week the amount of feed increases by 8%. It is important that quail weighs not less than 160 g, and the chest should have a good layer of subcutaneous fat.
Did you know? Quail eggs are good for developing mental abilities. In Japan, each student receives 2 quail eggs for lunch.
Quail - it is quite a profitable bird, while the cost of feeding and maintaining them is small. We recommend you to use this instruction and wish to grow beautiful quails.