Quite often, we are faced with the issue of winter storage of vegetables and other products. An ideal place is the cellar, however, in order for products to be in it for a long time, it is necessary to ensure effective ventilation. In the article we will tell how to make a hood in the cellar.
How it works?
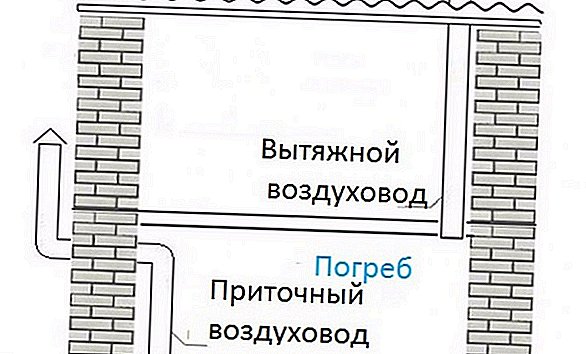
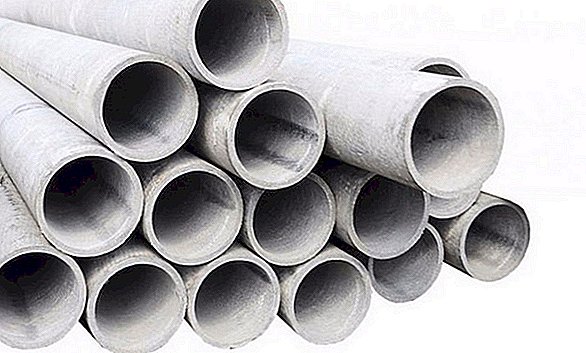
Natural ventilation must have 2 pipes: supply and exhaust. It is best to use a galvanized or asbestos pipe when constructing a structure.  It is also important to correctly calculate the diameter: 1 square meter of the basement should be provided with 26 square meters. see duct area.
We also advise you to learn how to equip the proper ventilation of the pigsty.
Inlet pipe
It is necessary for fresh air to enter the cellar. For greater efficiency, it is necessary to install it in a corner that is located on the opposite side from the installation site of the hood. 
Important! Choose a place to install the supply air duct so that in winter it does not clog with snow.The air intake duct must be positioned so that its open end is at a distance of 40-60 cm from the floor. It should completely penetrate the ceiling and rise above the roof about 80 cm.
Exhaust pipe
Thanks to her, outflow of stale air from the cellar will occur. It is recommended to install it along the corner so that the lower end is under the ceiling.  It should be held in a vertical position through the entire cellar, the roof and go beyond its limits by 50 cm.
In order to collect less condensate or frost in the duct, it is warmed - one more is inserted into it, and the distance between them is filled with insulation.
Find out also all the advantages and disadvantages of a plastic cellar for questioning.Ventilation in the cellar with two pipes is carried out due to the different specific weight of warm air inside and cold outside.
If a large temperature difference occurs, there is a risk of a draft that will lead to the freezing of the cellar.  In order to prevent this, during the construction they use gate valves on air ducts, which allow adjustment of the air circulation.
Types of systems
To date, perform the installation of ventilation systems of two types: natural and forced. The choice of one or another option is influenced by the volume and layout of the basement.
Forced
The design of the forced system includes pipes, but in order to ensure the forced movement of air, fans are built into them.
Did you know? About the need and benefits of ventilation knew many centuries ago. However, then there were no special designs - just carried out the airing.Usually, the exhaust duct acts as a fan installation site. With its help, it is possible to reach an artificial vacuum in the cellar, thanks to which fresh air can enter the room through the air inlet.
Depending on the volume of the cellar, fans of different capacities are selected. If the basement has complex configurations, the installation of fans is made on both channels. 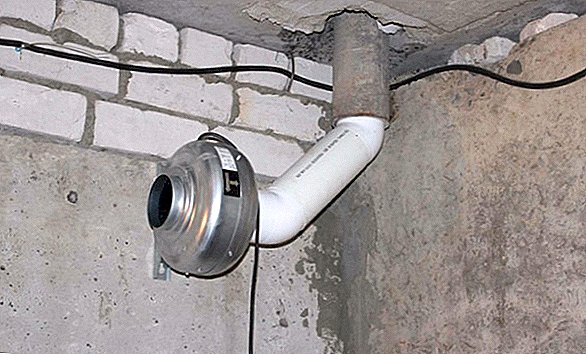 When building a forced draft, you cannot do without the help of a specialist who will help you correctly carry out calculations for the entry and exit of air flows, the diameters of the required air ducts and the power of the fans.
Natural
The main idea of creating a natural extract is to account for the difference in pressure and temperature in the cellar and beyond. It is very important to correctly determine where the pipes will be located.  It is better to place the air inlet at a height of 25-30 cm from the floor, and the exhaust should not be lower than 10-20 cm from the ceiling. If you place it below, moisture and mold will soon appear on the ceiling.
The natural ventilation system is recommended for small cellars with one room.
You will be interested to know why you need ventilation in the hen house.
How to make calculations?
If you decide to make a hood in the cellar with your own hands, you should pay important attention to the calculations related to the diameter of the pipes.
 When building a professional ventilation complex calculations and formulas are used that are inappropriate for a home-made design. We suggest to familiarize with a technique which will be suitable for a construction of self-made ventilation.
Important! Be sure to cover the opening of the draw tube with a metal grid, as without it rodents and insects can penetrate into the cellar.We assume that for 1 square meter cellar you need 26 square meters. see the cross-sectional area of the pipe. We calculate the diameter of the duct should be, if the size of the cellar is 3x2 meters.
First, you need to calculate the area of the cellar:
S = 3x2 = 6 sq.m.
Given the ratio that we have taken as a basis, the cross-sectional area of the pipe channel will be:
T = 6x26 = 156 sq. Cm.
The radius of the ventilation channel is calculated by the formula:
R = √ (T / π) = √ (156 / 3.14) ≈7.05 cm
Having a radius, we can calculate the diameter:
D≈14 cm = 140 mm.
If there is only supply ventilation (exhaust is represented by a hatch), the cross-section of the inlet pipe can be slightly increased - an air duct with a diameter of 15 cm is quite suitable.
 To ensure effective air exchange, it is recommended to install a chimney, the diameter of which is 10-15% more than at the entrance.
For the exhaust duct, an air duct with the following diameter will be suitable:
Dв = Dп + 15% = 140 + 21≈160 mm.
Installation of ventilation pipes
In this section, we will describe how to properly make the ventilation in the cellar and what you should pay special attention to.
Where to place

The supply air duct is brought out of the ground. Its lower end should be located almost near the cellar floor, at a distance 20-30 cm.
To install the exhaust pipe choose the opposite corner of the basement, hold it close to the ceiling. One of its ends is displayed through the ceiling on the roof.
To improve the efficiency of the ventilation design, use the following advice: place a deflector on the pipe above the roof.
Having covered a pipe with a cap, you will be able to create negative pressure thanks to which efficiency of ventilating system will increase.
Did you know? In ancient Egypt, first began to actively apply ventilation. Priramid Cheops has a huge number of ducts.
Material selection
For the construction of hoods usually use these materials:
- polyethylene;

- asbestos cement.


Installation
By installing the ventilation system, pay attention to such moments:
- When installing the system in an already finished cellar, you will need to make a special hole in the ceiling.
- Through this hole it is necessary to lower the pipe into the basement - it will pull the air out. Fix it at the top, near the ceiling.
- The part of the pipe that is outdoors should be lifted at least by 1500 mm above the ground or above the roof.
- In the opposite corner of the basement it is necessary to make a hole in the roof and install a supply pipe through it. It should end at a distance 20-50 cm from the floor.
- The supply air duct should not stick out too much from the roof. It will be enough to raise it to 25 cm.
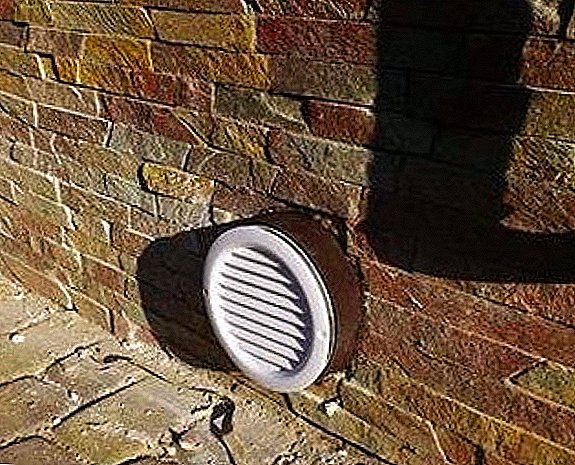
- When installing the inlet pipe in the wall, it is necessary to put a deflector on its outer end.
- If the house has a fireplace or stove, the exhaust pipe should be installed near the chimney.

Important! Improper ventilation or lack of ventilation will lead to stale air, which must seep into the house and can adversely affect people's health. To prevent this, regularly check for traction.There is nothing difficult in installing a ventilation system, the main thing is to follow all the rules and recommendations.
Tips and recommendations for the operation of the cellar
In order to keep the cellar in good condition and store food there for a long time, it is necessary to take care of the microclimate.  It is very important to maintain low humidity in the basement. To do this, periodically air the room. In the summer, it is recommended to keep the doors and dampers open. Gusts of warm wind quickly drain the cellar.
There are situations when it is necessary to increase the level of humidity. This can be achieved by spraying water from a spray bottle, and wet sawdust is also laid out on the floor.  You can place a box filled with wet sand - this will also help increase humidity. If you want the cellar to cope with its functions normally, you must ensure the following conditions:
- Lack of light. Electric lighting should be turned on only when people enter the basement.
- Low air temperature. Do not allow high temperatures in the cellar.
- The presence of fresh and clean air. Ventilate the room, monitor the normal operation of the ventilation system.
- Humidity. It is recommended to keep the air humidity at 90%.
We advise you to familiarize yourself with the rules of storage of corn, cucumbers, tomatoes, onions.
Ventilation system check
After the installation of ventilation is completed, it is necessary to check its effectiveness:
- A thin sheet of paper is applied to the inlet pipe. If you notice that it is waving, then the system is working and the air enters the basement.
- Light the paper in the iron bucket and leave it in the cellar. Observe the direction of the smoke - it should lean towards the chimney.
Did you know? The use of the first forced ventilation dates back to 1734.Now you know how to make a hood in the basement with your own hands. The event is not very complex and not even very experienced builders.