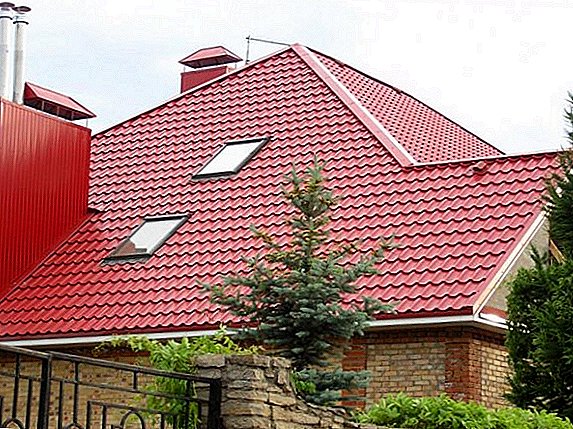
Installing the roof on a new building is an important step that requires not only financial and time costs, but also proper coordination of actions. Even in case of overfilling of the old coating, it is necessary to take into account the peculiarities of the roofing material. In this article we will consider the roof covering with a metal tile. Read about how to properly install metal roofing, which structures and in what sequence should be installed. Also consider post-assembly care.
The choice of metal
When choosing a metal tile, one should pay attention not only to the color and price, but also to many other points that will help to choose high-quality material for the roof of the house.
Important parameters:
- steel thickness;
- zinc layer thickness;
- Features of protective and decorative coating.

Standard steel thickness should be 0.5 mm. It can be measured only with a micrometer, which is used by unscrupulous manufacturers, which reduce the thickness of this layer to 0.45 mm. The problem is that a thinner layer eliminates the possibility of movement on the metal tile. Yes, this option is used, but only for steep slopes, on which no one will walk.
If you prefer an environmentally friendly coating for your home, find out how to roof the roof with ondulin.It is zinc that protects the metal from corrosion, therefore not only the appearance of the coating, but also its durability depends on the thickness of the zinc layer. Standard consumption of zinc per 1 square is 100-250 g. This information should be specified by the manufacturer. If not, then buying such coverage is not recommended.

During the selection of material should pay attention to the appearance of the sheet. A polymer coating that performs two functions should be uniformly applied to the sheet; otherwise, such a metal tile will be short-lived. The problem lies not only in the fact that the roof will quickly “grow old”, but also in the fact that under the action of ultraviolet, areas with different thicknesses of protective and decorative coating will fade differently. As a result, your roof will be covered with huge bright spots that will not decorate the building.
Also note that the following materials can be used as a protective and decorative coating:
- polyester;
- plastisol;
- pural

Plastizol is easily distinguished from other variations, as well as a well-marked pattern is applied to the tile. By itself, the material has good resistance to mechanical damage. Resistance to fading is average.
Pural - is the most expensive and sustainable coating that does not fade over the years, maintaining the brightness of colors. Also, the polyurethane coating does not suffer from mechanical stress, which increases wear resistance as well as resistance to aggressive media. 
Important! Sheets of tiles from different manufacturers are not joined, even if they have a similar thickness of layers.
Rules for transportation and storage of metal tiles
Considering the fact that the top layer of metal tile can become unusable as a result of mechanical damage or exposure to UV, which is particularly reflected in cheap roofing options, it is important to know the rules of transportation and storage.
A few words about loading / unloading. Loading and unloading of materials is mechanized. If this is not possible, then a sufficient number of people are attracted so that the bundles of sheets are loaded / unloaded accurately. Workers are required to use gloves. Transfer sheets produced in a vertical position. To eliminate the violation of the integrity of the upper layer, remove or put the sheets in a stack to vertically, excluding friction between the surfaces. It is forbidden to dump sheets even from the minimum height, and also to remove a protective film before final installation.  The loading of metal tiles is mechanized.
The metal tile is transported only in packs, which excludes mechanical damage to the protective surface. The packs are laid out on special wooden linings that are at least 4 cm thick. It is also imperative that the packs be secured so that they do not “drive” during transport. The vehicle must be closed type so that during transport the sheets are not exposed to the external environment (sun, wind, rain, frost). Dimensions of the car body should be larger than the packs to avoid deformation.
Important! The speed during transportation should not exceed 80 km / h.After unloading, packs are placed on a flat surface with a slope of 3 ° to prevent condensate from accumulating. Also, do not forget about the wooden lining, which should separate the surface and the bottom of the box. The room in which the roofing material is located should not be heated. The sheets should not get ultraviolet, rain, snow. Strong temperature drops during storage are not allowed.
 Storage of metal tiles
The permissible shelf life of metal tiles in a common box is 1 month. If the work is postponed, then the sheets are carefully removed from the box, and then folded on top of each other. Wooden slats are placed between every two sheets to prevent sagging. The height must not exceed 70 cm.
Installation of the cornice strip
The eaves level is necessary for protection of a eaves board from moisture hit. The bar is made using the same technology as the tile itself, and also has the appropriate coloring.
The first thing to do is to attach a frontal board, on top of which the plank is mounted. The front eaves board is attached to the ends of the truss system using galvanized nails. Sometimes the board does not need to be nailed, as it is placed in special grooves.  Front eaves board
Further, with the help of a grooved board, a hemlock is made. A support bar is fastened to the wall, which serves as an additional support for filing the eaves.
After that, we are engaged in mounting brackets for drainage. They are located either on the eaves board, or on the rafter legs.
Now we proceed to fastening the mounting plate itself. It is mounted in front of the roofing. Screws, fastening the bar, screwed into the eaves or frontal plank. The distance between the screws should be about 30-35 cm.  Mounting bracket mounting
Did you know? The first professional flooring was invented in England in 1820, after which it massively spread throughout Europe. Henry Palmer, who invented this coating, also designed the first iron elevated road.
Installing the bottom end
The main task of the bottom endova is to protect the space under the roof from moisture. It is installed before mounting sheet metal.
It all starts with the installation of sheathing, which should be solid on both sides of the joints. Further along the entire length of the wooden gutter, a layer of waterproofing is laid down, which will prevent the leakage of moisture.
After that, the lower endova is attached to the waterproofing layer with the help of screws. The bottom edge of the valley must be located above the eaves.  Installing the bottom end
Installing a chimney bypass
The most difficult stage, which requires proper calculations and maximum accuracy in the installation process.
There is a special device that is designed to form a contour around the chimney. It is called an apron.
Before installing the apron, you need to fill the additional crate around the chimney, and then lay the sealing layers. Over the seal fits the bottom apron. Next, put the sheets of metal, and behind them mount the top apron. The top apron should fit snugly to the pipe so that the water runs down it, not under it. For this, a brick is made on the brick pipe (groove) into which the edge of the apron will enter.  Installing a chimney bypass
After laying the top apron, the seal is filled with sealant. After that, the angle of the apron, adjacent to the pipe, is fastened with dowels. And the bottom corner, which is in contact with the tile, is attached to the screws.
To decorate your home, familiarize yourself with removing old paint from the walls, glueing different types of wallpaper, insulate window frames for the winter, install a light switch, a power outlet and install a flowing water heater.
Sheet lifting
Lifting is carried out by at least two workers who must wear gloves. If the sheet is long, then you need to take care that it does not bend in the center, otherwise the roofing material will be damaged. To safely raise the sheets on the roof, you need to build guides from the boards from the level of the blind area and to the level of the cornice. Raise the roofing material should be carefully, without sudden movements. If special equipment is used, then lifting is possible directly in a pack.
As for the movement on the sheets, then there are some rules. Immediately it should be clarified that the quality sheets are not deformed by the weight of one person. When walking on sheets, the foot should be placed only on a separate fragment of the tile, while the foot is parallel to the line of the slope. Workers should have shoes with soft soles to reduce the load on a small area of tile.  Movement on sheets of metal tile
Important! It is forbidden to step on the crest of a wave, otherwise the sheet will be spoiled.
Installation of roofing material
Laying in one row.
- We start the installation from right to left. We place the first sheet on the slope and align it with the eaves and the end.
- Screw the first screw at the ridge in the center of the sheet.
- We put the second sheet with an overlap of 15 cm. We align it, then we connect it with a screw to the first sheet.
- Put the rest of the sheets, fastening them together.
- Align the cascade of bonded sheets of metal, then screw them to the batten.
 Installation of metal in one row
Laying in several rows.
- The first sheet is laid and leveled.
- Above the first sheet the second one is laid, which is fixed at the ridge (in the middle) with a single screw. Connect the bottom and top sheet with a screw.
- Further, 2 more sheets are laid on the same system, after which a block of four fragments is leveled and screwed to the batten.
 Installation of metal in several rows
Laying on the triangular slope.
- We find the center of the triangular slope, after which we draw a transverse line.
- In the center of the sheet metal also draw a transverse line.
- We spread a sheet of tile on the slope, after which we combine the lines. Fasten with one screw near the ridge.
- Next, the installation is carried out to the right and left of the center sheet. It is possible to use both the laying scheme in one row, and in two rows.
 Installation of metal on the triangular slope
If you want to significantly expand the living space in a private house, consider the installation scheme and instructions for the construction of a mansard roof.
Fastening sheets
It is important not only to lay the sheets correctly, but also to fix them at the right point. It depends not only on your skills and knowledge, but also on the correct installation of the batten.
The crate is a construction of wooden boards, which are located at the same distance from each other. If the crate is made correctly, then when laying the sheet, each board will be located under the top of a separate tile (segment). It is in this place that the screw must be screwed in so that the metal tile lays down well and does not deform. Screws are screwed along the line, which is located 1-1.5 cm lower from the stamping line of the ridges.
Now for the installation of the end strips. It must be positioned above the sheathing layer to the height of a single wave so that the end joint of the roof is completely blocked. Further along the entire length screws are screwed. It should start from the right or left edge, making small indents to eliminate the appearance of blisters.  Fastening sheet metal
Installing the top endova
Immediately it should be clarified that the installation of the upper end of the valley is not mandatory, since it performs, rather, the role of decoration, rather than additional protection from moisture. Upper endova fits with overlap in order not only to block the lower, but also to prevent moisture from entering into small cracks. For this, an element made of the same material as the sheets of metal tile is placed 10 cm above the axis of the inner corner on both sides. After that, the design is fixed with bolts so that the screws are 1 cm below the ridge forging ridges.
Important! Between the lower and upper end of the seal does not fit.
 Installing the top endova
Install skate
Immediately it is necessary to clarify that you only need to mount the ridge. Alone, this design you do not correctly install.
Sequencing:
- Check the flatness of the junction of the slopes. Curvature should be no more than 20 mm.
- If the ridge has a semicircular shape, then before installation we put a cap on its ends.
- For fixing use special ridge screws that go along with rubber washers. Attach start from the ends.
- It should be fixed flush with the sheet metal. When mounting, they stick to the axis line, keeping a small gap.
- It is necessary to make a small indent between adjacent screws, so that the design is securely attached to the sheets.
- If you install multiple ridge planks, then you should perform a ceiling of 0.5-1 cm.
 Install skate
It is important to remember that the joints between the slopes are filled with seals. For these needs, you can use glass wool, foam or profile filler.
It will be useful for owners of country houses, summer cottages, as well as residents of the private sector in cities how to make a path from wood cuts, concrete paths, build a formwork for the foundation of the fence, make a fence from gabions, fence from a chain-link net, build a porch with your own hands and install water supply from the well.
Installation of snow guard
Snow traps are used to stop or break a layer of snow that rolls down from roofs. If the winters in your region have little snow, then it is not necessary to install a snow guard, however, in the northern regions a similar construction must be installed.
Installation process:
- For mounting use special long screws, so that the design is attached not to the sheet of metal, but to the sheathing.
- Before installation, you should be careful about gaskets that will serve as a seal hole for snegozaderzhateley.
- Calculate the distance between the mounts. It is necessary to fix the delay on each segment.
- We mount the lining corner, which will serve as the base.
- On the corner fasten "stopper".

Important! The set of snegozaderzhateley should include screws and gaskets.
Post-installation cleaning
After completion of work, be sure to remove all debris from the roof. It is also necessary to diagnose roofing. If there were scratches, small holes through which water could leak, then these defects should be corrected. Scratches are painted with a paint of the appropriate color intended for painting exterior coatings that will come in contact with sunlight and moisture. Small holes are filled with sealant, which must also be resistant to aggressive media, UV and moisture.
Coating care
If the metal tile was correctly installed in compliance with all instructions, then it is enough once a year to check the roof for integrity, as well as inspect the joints and pay attention to the outer layer of paint. If you find a small problem, be it a scratch or the formation of a small hole, use the instructions described above. If a separate sheet or other element of the roof is seriously damaged, then it is mandatory to replace it.  Metal tile coating
Did you know? In Germany, most of the old buildings have a slate roof. Such a roof comes into disrepair at the moment when the nails are destroyed, with which individual segments are nailed.Now you know how to install the roof, what additional structures need to be installed and what problems may arise. If you find it difficult to navigate the instructions outlined, then contact the master, or watch a few videos on this topic. Remember that even high-quality material can easily be spoiled by improper installation.