In the process of building a house, it is necessary to take care of the insulation not only of the walls and roof, but also the foundation base, so that future housing is as warm and inexpensive as possible during the heating season. Today we will look in detail at the course of actions for insulating the basement of a building outside, and also find out which insulation is better suited for this purpose.
Material selection
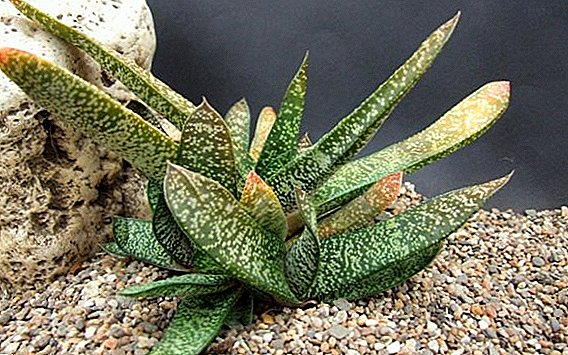
Before starting the process of warming the basement plinth, it is necessary to select the appropriate material. There are many insulation, but among the most popular emit polystyrene, foam and foam. Consider how they differ and which one is better.
Did you know? Penoplex was invented in the USA in 1941, but in the post-Soviet space it was started to be used as a heater only in the late 90s.
Polystyrene
This insulation is an effective modern heat insulator. It is also called foam plastic or advanced foam plastic. There are several types of polystyrene - extruded and foamed. Between themselves, they differ in production technology and quality.
Specialists in the construction industry tend to use extruded polystyrene.  It costs more than foamed, but has many advantages:
- low heat transfer coefficient;
- strength;
- environmental friendliness;
- resistance to moisture;
- durability.
It will be useful for you to read about how to make a gable and mansard roof, as well as how to roof the roof with an ondulin and metal tile.
The advantages of polystyrene, compared with other types of insulation, are:
- lower cost;
- special structure that does not absorb and does not allow moisture, which preserves the integrity of the plates at low temperatures;
- long service life;
- preservation of heat-insulating properties throughout the entire period of operation;
- "inedibility" for rodents;
- simplicity of installation of insulating designs.
 The disadvantages of polystyrene include:
- the ability to release very dangerous toxic substances in case of fire;
- vapor permeability, due to which mold and fungus can develop, destructive structures and adversely affect the indoor climate.
Did you know? Polyfoam was invented by the German pharmacist Edward Simon in 1839. But actively used on an industrial scale, it began only in the middle of the XX century.
Penoplex
Penoplex - a new progressive insulation that is very effective in terms of heat retention. For the manufacture of penoplex high pressure and temperature are applied, which affect the granules of the material, they are inflated and filled with air.  The resulting material is characterized by a finely porous structure, which has the same tiny isolated cells, which allows you to retain heat well.
The advantages of Penoplex include:
- long service life;
- low thermal conductivity;
- minimal moisture permeability;
- compressive strength;
- simplicity and convenience of processing and installation;
- environmental friendliness;
- low chemical activity;
- maximum biostability, which implies resistance to rotting and decomposition of the material.
We advise you to read about how to make a fence of gabions, bricks, picket fence, chain-link mesh and a wicker wooden fence to give.
Despite the many advantages of Penoplex, it has one serious drawback - the ability to melt and ignite if the recommended temperatures are not followed. 
Styrofoam
Polyfoam is a special foam material, the granules of which are 98% air. Polyfoam is characterized by good thermal insulation properties, therefore, it was previously actively used for insulation of premises.
The advantages of using foam for insulation include:
- material cheapness;
- durability;
- low thermal conductivity;
- simplicity in processing and installation;
- high speed work.
The disadvantages of foam include:
- fragility;
- the need for additional ventilation;
- ability to absorb moisture;
- release of toxic substances during combustion;
- propensity to freeze in the period of severe frosts and the possibility of damage from direct sunlight on the material.

Digging the base around the perimeter
Before proceeding to the weatherization of the basement of the foundation, it is necessary to dig out the foundation to the ground. For this, a trench is being dug around the perimeter. The optimum trench width should be at least 1 meter.
If a new house is being built, the procedure is simplified, since there is no need to dig in the foundation - its insulation is made immediately after construction.
Surface preparation
That part of the foundation, which was under the ground, as well as the part that was above the ground, is cleaned of dirt and pieces of concrete. To do this, you can use a spray or high pressure washer. If you do not have such devices, you can use a regular brush and walk it over the entire surface, carefully cleaning the foundation.
Important! When using water to clean the foundation, it is necessary to dry the surface, to do this, suspend work for several days.

Performing drainage
If there is a risk of underflooding of the foundation and groundwater coming close to the soil surface, it is necessary to drain. For this, the bottom of the trench is covered with sand, and geotextiles are laid on top, over which a layer of gravel is poured.
We recommend reading about how to glue different types of wallpaper, how to insulate window frames for the winter, how to remove whitewash from the ceiling and old paint from the walls, how to put a light switch, a wall outlet, and how to install blinds on windows, a running water heater and air conditioning system .
On the gravel is placed a perforated pipe, the end of which must be led to the collector. The pipe is wrapped with geotextile and covered with a mixture of sand and gravel.
Plaster wall coating with primer
The dried walls of the basement basement are coated with a latex-based primer. This tool will allow to fill all the cracks and pores that are on the surface, and provide better adhesion of the waterproofing to the foundation. 
Laying self-adhesive waterproofing
A layer of waterproofing is needed to prevent moisture from entering the concrete surface. Polyurea can be used as a waterproofing material - it is applied in a liquid form, resulting in a thin and durable elastic membrane.
In the absence of mechanical effects on the membrane, such waterproofing protection will last more than 30 years. If the film is damaged, this place is treated with a small amount of polymer - after that the damage site will not affect the solidity of the layer.
It is also very often that liquid rubber is used as a waterproofing material - it is characterized by a shorter service life than polyurea, but costs much less. Such a tool can be purchased already in finished form. For use, it is simply mixed and applied to the surface with a spatula.
Video: foundation waterproofing
As an alternative to liquid waterproofing substances, bitumen-based roll material is used; it is attached with a burner, heating the material to 50 ° C, and applied to the foundation. To glue such material is necessary in the direction from the bottom up.
There are also materials (for example, "TECHNONICOL") that do not require the use of high temperatures. After applying the bitumen primer to the surface and removing the protective film, the sheets of material are simply pressed to the surface and adhere to it. The upper edge of the insulation is fixed with a special rail.
Fixing sheets of insulation
Before starting to warm the foundation, it is necessary to mark with the help of the level the bottom line to which the plates will be attached. It is necessary to lay insulation materials starting from the corner of the foundation.
To avoid the formation of long vertical seams, you can make gluing sheets in a checkerboard pattern. Initially, the insulation is placed on the lower part of the foundation, then the rest of the rows are put upwards.  For fixing use a special glue, which is applied on the edge and in the center of the sheet. After applying the adhesive, you need to wait a minute and proceed to gluing the sheets to the foundation.
Important! There should be no traces of organic solvent in the adhesive, which can have a destructive effect on the insulation.
To do this, they are well pressed to the surface and fixed on it for a few seconds. Drying of the glue occurs gradually, so if you find any errors or unevenly placed insulation, you can fix it by simply turning the sheets at the desired angle.
If you need to attach another layer of insulation, it is placed in a checkerboard pattern so that the upper layer overlaps the seam of the lower layer - this will contribute to better thermal insulation. Gluing the top layer does not differ in technology from attaching the bottom layer of insulation.
Dowel
That part of the foundation, which will be below the ground level, does not require additional fastening - after the completion of the installation work, it is simply sprinkled with earth. The part that will not be powdered must be attached with special dowels.  They are characterized by a wide plastic perforated cap, due to which the insulation is pressed tightly against the wall. To attach the dowels in the insulation, the through holes are drilled in such a way that they enter the concrete by 4 cm, after which they plug in the dowels.
Important! The size of the dowel is selected in accordance with the thickness and number of layers of insulation.
Sealing gaps
When the installation of insulation is fully completed, the seams should be treated for better insulation of the insulation. To do this, use a bituminous composition or conventional mounting foam.
The process of sealing seams is quite simple and consists in processing the chosen means of the butt sections of insulation. If a bituminous compound is used, they fill the slots flush. When using foam, after it is completely dried, all irregularities are flush flush. 
Trenching
After sealing the gaps, you can begin to backfill the trench. For this purpose, coarse dry sand is used, with which the bottom layer of the trench is poured. After that, gravel mixed with sand is poured over the sand. A gravel cushion will be a good basis for warming the soil layer.
Learn more about how to install sectional doors, how to properly sheathe the door, how to make a plasterboard partition with a doorway, how to sheathe walls with plasterboard, how to make paths from sawn wood and concrete, how to build a pool, bath and veranda to the house.
Plastering
To protect the insulation from the chemical effects of moisture, which is constantly in the ground, reinforcing fiberglass mesh is fixed on the walls and plastered with a thin layer of solution for coating waterproofing.
Video: basement (basement) insulation with their own hands
Formwork under the blind area
To perform the formwork, it is necessary to determine the width of the blind area. It can be from 70 cm to 2 m and depends on the characteristics of the soil. If the trench was covered with sand and gravel, it is recommended to make a blind area 1 m wide. The formwork for the concrete blind area will prevent the spreading of the concrete solution and determine the geometry.
We advise you to read about how to make a blind area at home with your own hands.
A mixture of gravel and sand should be leveled as much as possible with a rake, using a level so that the formwork is level. Further, on the width chosen by you, along the entire perimeter of the foundation, pegs are hammered into the ground. In front of them, flat wooden planks are mounted on the edge and fastened together, so that an empty frame is obtained.
After the frame is made, it is necessary to make expansion joints to prevent cracking of the concrete at low temperatures. For this, boards of 2 cm in thickness are suitable - they are mounted on an edge perpendicular to the foundation and formwork frame, the distance between them should be about 2 m.  In the corners of the board are installed diagonally from the corner of the foundation to the corner of the formwork. Considering that the main purpose of the blind area is to protect the foundation from water during rains and snowfalls, it must be done with a slope, for this board are installed at a slight angle from the building to the edge of the formwork.
Important! For fastening use self-tapping screws that then it was convenient to take out them.
It is recommended to tilt from 2% to 10%; the recommended rate is 5%. Due to this difference, the water will quickly move away from the wall of the building. Before attaching the compensation boards to the formwork frame, check that they have the same angle of inclination using a level.
When the formwork frame is ready, it is necessary to proceed with the installation of waterproofing materials and insulation, as well as a reinforcing mesh, the cell size of which should be 10 by 10 cm.
Video: blind area around the house with their own hands
Concrete Pouring
After all the steps for preparing the formwork are completed, you can start pouring concrete. It can be purchased at a concrete plant or in any specialty store. Be sure to make sure that it is of high quality.
If you plan to save and make concrete yourself, for this you need to use cement (1 part), sand (2 parts) and crushed stone (3 parts):
- Initially, a little water and cement are added to the mixer to get a very fluid mass.
- Then a little rubble is poured.
- All components are mixed for 3 minutes.
- At the final stage, sand is added to the mixer.
Important! To the manufacture of concrete can proceed independently only if you have previously had this experience, since there is a clear technology and many nuances that, if not followed, the concrete can crack and will not last for a long time.

Often, the compensation boards remain in the formwork, but it is worth remembering that the tree is able to quickly absorb moisture and expand, and shrink after drying, which leads to cracking of the blind area.
Therefore, after the concrete has been poured in and has not fully grasped, it is necessary to remove the compensation boards and wait for the solution to completely dry. After the concrete is completely dry, the cavities left over from the compensation boards are filled with mastic or liquid rubber.
Above the finished paving after full drying of concrete and mastic tile is laid or other material - depending on personal preferences.
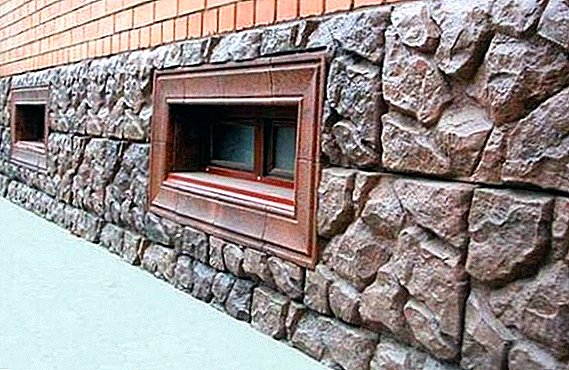
Foundation Finish
After the plaster is completely dry, you can begin to finish the foundation. To do this, use decorative materials in the form of artificial stone or tile. You can limit painting with bitumen or ordinary paint.
Video: do it yourself trim
Thus, the warming of the basement with your own hands is a rather laborious and difficult process. However, if you follow all the recommendations and observe the sequence of work, you can get a good result that will keep the house warm and cozy for a long time.
Reviews from the network