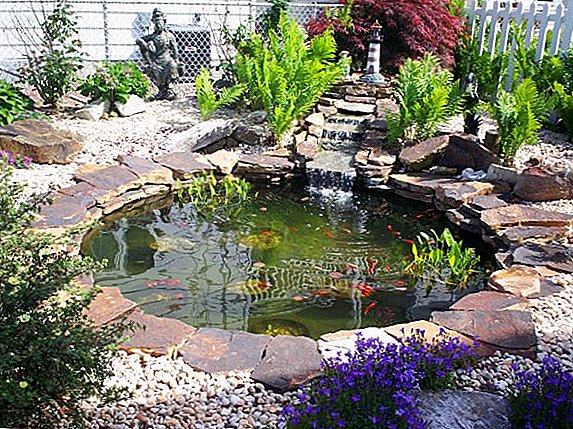
Own pond in your plot is not only one of the ways to create a comfortable, relaxing atmosphere in the country, but also the opportunity to add an exclusive flavor to the landscape design. Do you think such a hydraulic structure is beyond your power? You are mistaken, we will tell you how to master the laying of a pond with your own hands, while spending a minimum of money and effort.
Choosing a place
Properly chosen place for the future of the pond is the key to its long-term operation and preservation of a presentable appearance.
Make a small beautiful corner in your country house where you can always spend the day with health benefits: a pool, a fountain and a waterfall.
Consideration of relief and soil
There are several important rules that will help you choose the right place for your design:
- The openness of the site. It is recommended to choose the most open, free from trees, bushes and other plantations place. The presence of plants in the vicinity is undesirable for several reasons: the root system of trees will damage the walls of the reservoir, and the leaves, fruits or branches, falling into the water, will rot, causing the water to deteriorate rapidly.
- Relief and soil. The best option is a site that remains wet for a long time after the rain, because loamy or clay soil quickly prevents water from escaping. Placing the pond here will provide an opportunity to significantly save on waterproofing. A great place for a reservoir can serve as depressions or hollows formed by natural means. And at the location of the pond on the site with a high level of adherence of groundwater will need the implementation of drainage systems.
- Proximity to the water source. Such water bodies should be carefully and regularly maintained: change water, clean it from algae, so it is very important to provide for a nearby source of water, which will significantly speed up and facilitate the process of filling the structure with new water.
- The possibility of expanding the territory. If the size of the site allows, then you should consider in advance the possibility of expanding the pond: the creation of new decorative structures, the construction of a bridge, gazebos, etc.

Proper lighting
Sunlight plays a big role in choosing a site for future construction. It is very important to choose a moderately lit area, without direct sunlight. Constant sun illumination will dry the water and promote active reproduction of aquatic bacteria, activation of green algae growth, formation of mud. On the other hand, the lack of sunlight will lead to inhibition of the growth of ornamental plants.
Important! It is possible to build an artificial pond on soils of any kind. However, on some of them the costs and time for construction will increase significantly.
The ideal is:
- the area above which the sun appears before 11:00 am and after 3:00 pm;
- general illumination - no more than 6 hours per day;
- blackout of the pond - at least 40% at the peak of the sun.

Construction technologies
There are several technologies for the construction of an artificial pond that have their own advantages and disadvantages. After studying the features of each, you can make the best choice for your site.
If you have a cottage and you like to build, learn how to make a garden swing, a stone grill, gabions, a gazebo, rock arias, and a dry stream.
Film strip
The simplest, cheapest and most versatile way to form a pond is through a special film. For its organization use 2 types of film:
- Polyvinyl chloride: available in rolls, has a low cost, has a wide color gamut. But black is usually used to create ponds.
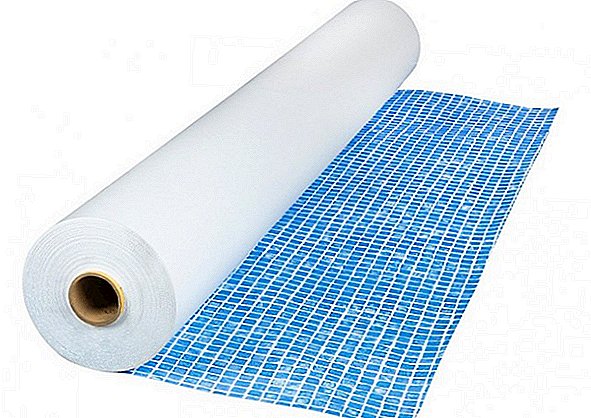
- Butyl rubber: to the touch it resembles rubber, has high frost resistance and resistance to tearing. Retains plasticity even at -60 ° C.


After the selection of a suitable film is completed, proceed to construction work:
- Carry out the layout of the site on which the pond will be located.
- Dig a trench according to the size of the structure.
- Prepare the substrate. To this end, the walls and floor of the pit are well tamped down, a waterproofing layer is laid, which can be geotextile or PVC film, covered with sand and tamped again.
- A film is laid over the sand layer. During this event, you may encounter some problems: first, because of the uneven surface on the film may form folds. This is quite normal, but it is better to try to make one big fold, than many small ones. Secondly, it is not recommended to allow the tension of the material, since it can burst under the weight of water.
- After laying the film proceed to pouring water. The pond filled with water is left for several days, and then the sticking pieces of the film are carefully cut off.
- The last step is to strengthen the "coastal" line. As a reinforcing material used stone, pebbles, geomats, gratings.
 This method has several advantages compared to others:
- low cost of materials;
- simplicity and ease of implementation;
- the ability to create a design of any shape and size;
- the rapid pace of pond creation;
- there is no need to contact specialists, as even an inexperienced master can build a reservoir.
Did you know? Very often the bottom of the pond is lined with a blue film, supposedly in tone of water. In fact, the blue bottom in nature does not exist - it is dark or dark gray. It is this color and should be preferred.
When organizing a pond on a film basis, you need to remember that he will not be able to serve for a long time, and you must be prepared for what will have to be repaired annually. The film is easy to damage, tear or cut when cleaning. In addition, the edges lying on the surface can melt under the influence of the sun. 
Concrete pond
One of the most durable, reliable and durable is considered a pond of concrete. Its construction proceeds in several stages:
- They tear out the pit, with a margin of 20-25 cm, which is necessary to strengthen the bottom.
- Remove stones from the pit, the remnants of the roots and other objects.
- The bottom is covered with rubble with a layer of 15 cm and tamped down.
- Starting from the center to the sides, lay a layer of waterproofing.
- Concrete is poured: a solution is kneaded, a reinforcing mesh is made, and the mixture is poured. It is allowed to harden and at the end put a layer of liquid glass.
 Concrete pond is able to "boast" the following advantages:
- strength and durability of the structure;
- the possibility of creating a reservoir of any shape;
- ease of maintenance;
- low cost of concrete solution.
Learn how to make a path of cuts, as well as of concrete.
However, to build a concrete bowl is not so easy as it seems at first glance. During the work it will take a lot of effort and time. In addition, the concrete structure requires additional processing of cold-resistant means and liquid glass.
Pond from the finished tank
The easiest in the organization is the pond from the already finished bowl. In hardware stores you can purchase designs of polyethylene or polyvinyl chloride.
Important! Ordinary concrete needs both internal and external waterproofing. There are brands of material that are not afraid of moisture, but they are very expensive and require special casting technology. Because of this, it is impractical to use expensive concrete to create ponds in most cases.
Such artificial ponds are quite durable, cold-resistant. Their main advantages are considered to be:
- small weight of the structure;
- convenience and ease of installation;
- pretty decent service life - up to 15 years;
- lack of care in the care.
 Plastic ponds are not without drawbacks, among which are noted:
- small size and the inability to expand the reservoir;
- high price for quality material;
- non-natural appearance.
If you want to install a fence for a country house, a plot or a dacha, be sure to read how to choose and install a brick fence, a metal or wooden picket fence, a fence from a chain-link grid, a fence from gabions and a fence.
You can also make an artificial reservoir from improvised means. For example, an old cast-iron bath can serve as an excellent shape for the future reservoir. Such a pond has high strength to the effects of the sun, water, is quite durable and is able to serve for many years.
The disadvantage of this design is an unnatural appearance, since the bath has an exceptionally rectangular shape, as well as a large weight of material, due to which problems may arise with its transportation to the site.  The form for the reservoir can also serve as an old car tire. Of course, it’s not necessary to talk about a large pond here, but it’s quite realistic to organize an original interesting corner on your site. For its construction it is necessary:
- cut off the top of the tire;
- dig a hole with a small margin around the perimeter;
- put the tire and cover it with a film;
- fix the film, pour water into the pond.
Did you know? If a in the reservoir planned run fish, its depth should be at least 2 m, and for carp habitat - not less than 2.5 m. It is this depth that allows water not to freeze in winter.
The coastal zone of the reservoir can be decorated with stones, pebbles, various plants. 
How to make a pond
To make a good, high-quality pond with your own hands, you should make a little effort, as well as spend your time and money. But the result is worth it, and the mini-reservoir will delight you and your family for many years.
You will be interested to know how to find the water at the well site, and how to choose between the well and the well to give.
The construction process of the structure, which will function year-round, consists of the following steps:
- The formation of the pit. One of the most important and at the same time difficult actions is to dig a pit. On the rise of the pit it is necessary to make several terraces: the largest - at a depth of about 2 m where the fish will dwell. Then, gradually rising, at a depth of 1 m and 0.5 m, respectively. Care must be taken to ensure that the walls of the pit were not completely smooth, but formed in the form of small steps, otherwise after the film has been laid, it simply "slip". After digging the trench, it is necessary on the coastal zone around the perimeter of the pond to remove the top layer of soil by approximately 0.5 m, forming a small trench. Such an improvised "rim" must be made under a slight bias so that the water after the precipitation does not flow into the reservoir, but remains in the chute. Then you should carefully tamp the walls and bottom: first use a wide board, then pour the walls and bottom of the excavation with a thin layer of sand and tamp with your feet.
- Strengthening the structure. To give the structure strength will need cement brand 500, water and ordinary watering can. The works are carried out according to the following algorithm: the steps of the excavation and its bottom are plentifully watered with water from a watering can, then they are sprinkled with a rather dense layer of dry cement. When the cement is absorbed, a strong “crust” forms on the surface. Such manipulations are carried out over the entire area of the pit. Upon their completion, it is necessary to leave the pond to set for 1 day in order for the cement to clutch.
- Laying the rough and finish film. At the very bottom of the pit (where the terrace is 2 m deep) the film is laid, or an old inflatable pool can be used as a material. With a pool or film, the bottom is covered and fixed to the ground with metal brackets (the brackets can be made by bending the rod with the letter P). Next, with the help of a draft film should be laid out the entire territory of the pit. To keep the film and did not move, it is fixed on the ledges with stones or bricks. On top of the draft it is necessary to lay the finishing film in the same way, fixing all the ledges with small layers of stones. The finishing film has good wear resistance, frost resistance, can last more than one year. After laying the film, you need to make sure that along the entire edge of the shore there is an adequate supply of 20-30 cm, which is necessary for secure attachment of the edges.
- Pond decoration. The coastal part of the pond along the perimeter must be laid out with small wooden blanks (logs). It is advisable to “fit” each such disc to one size, so that such an artificial fence has an aesthetic look. Also, the area between the wooden piles and the edges of the pond can be covered with natural stones. Next, the pond is poured with water and decorated at its discretion: planted plants, algae or rushes, set wooden snags. If the reservoir will contain fish, then you need to add a little river water.
Care rules
To personally create a pond for a long time pleased with its functionality and aesthetic appearance, it is necessary to regularly look after him. Care of a reservoir consists of several important points:
- Water purification. This procedure can be carried out mechanically using a conventional net or skimmer, or with the help of filters and pumps.
- Water level. It is necessary to regularly monitor the level of fluid in the reservoir, and when it falls, add water, and only clean, defended.
- Plant control. So that the pond does not grow, it is recommended to monitor the reproduction of algae, and with their active growth use special biopreparations that do not adversely affect living organisms. You also need time to remove dried, dead and rotten plants.
- UV water purification. Water periodically followed by cleaning the device with ultraviolet radiation, which will destroy the viruses and bacteria contained in the water.
- Safety net. Before the onset of leaf fall, it is necessary to tighten the net over the reservoir, which will prevent the fall of fallen leaves.
- Equipment cleaning. Before the winter cold, remove all equipment from the pond, dismantle pumps and filters.
 Homemade artificial reservoir is an amazing piece of nature, created by human hands. Do not deny yourself the pleasure to build a heavenly, quiet corner where you can enjoy your free time. Moreover, it is much easier to do this than it seems at first sight.