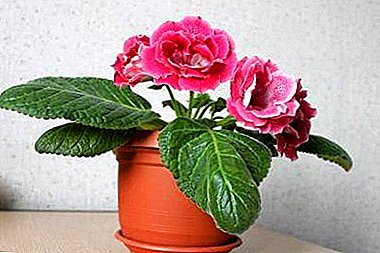
Gloxinia or hybrid sinningia is a beautiful flower that amazes with its variety of colors and shapes. Its flowering time is from March to October.
This delicate houseplant came to us from Brazil, and pleases with its abundant flowering every year.
Once, before every florist who decided to grow gloxinia, an important question arises - how to breed it? In the article we will look at how to plant using seeds and tubers. As well as the rules for caring for a flower after transplanting it.
Prerequisites and time
The rest period of Gloxinia is January and the beginning of February. Therefore, the most The best time to plant or transplant a plant is the end of February., at this time, tubers are usually awakened. However, it is worth paying attention to some details if you intend to plant it during this period. Since he does not always wake up in February, sometimes this process can be delayed until May.
A distinctive sign of awakening - the buds are formed on the tuber. Also, if the awakening process does not start for a long time, you can wake him up by an artificial method.
It is important not to miss the beginning of the awakening, because if you do not plant the tuber on time, it will negatively affect the plant and can destroy it.
Things are easier with planting seeds, since they can be planted at any time, but it is much more difficult to grow a strong plant from them. But, when growing seeds at home, you can create unusual hybrids or enjoy the view of rare varietal specimens.
Although seeds can be planted at any time, it is necessary to take into account the temperature, humidity and illumination of the environment in which the cultivation takes place. therefore when landing in the autumn-winter time, it is worth thinking about additional lighting, since the light day of this plant is 12-14 hours, and the temperature is 20-24 ° C.
In order for your gloxinia to bloom all year round, you can arrange a shelving for them or a warm shelf by organizing lighting for 14 hours a day. Why gloxinia does not bloom and how to make her release the buds, learn from our article.
Preparation: primer and pot
 Gloxinia is not very demanding on the composition of the substrate, so there should be no problems with the choice. It is better to give preference to a light soil with a sufficient amount of nutrients that will pass moisture and air well. Peat-based substrates are excellent. or the soil that is used for planting violets.
Also, you can independently prepare the soil by mixing 1 part of the soil, taken from under any tree (except oak), peat (with a low degree of acidity) and 0.5 parts of sand, you can add manure or humus. Before planting, the soil should be disinfected with boiling water or a weak solution of potassium permanganate.
When using too dense soil there is a risk of plant rotting., as it can provoke moisture retention in the soil and lack of air.
The choice of a pot depends on the size of the tuber:
- The diameter of the pot should be 4-6 cm wider than the tuber itself.
- The height should be calculated on 3-4 cm of the drainage layer, the soil with a completely covered tuber.
- A mandatory factor is the presence of drainage holes to prevent stagnant water.
- You can choose the material to your taste, there are no restrictions here.
- The color of the pot is preferably light so that gloxinia does not overheat in the sun.
It is better to start planting small tubers in not too wide vessels.so that the flower does not begin to build up the root system, since it will postpone the flowering of gloxinia at a later date. However, it is not necessary to overdo it; a vessel that is too tight (less than 9 cm) will not be beneficial to the plant. It can begin to wither and shed the leaves, and the soil will constantly dry out.
How to plant?
Now consider the question of how to properly plant the tuber of such a room flower as gloxinia. As mentioned above, it is important not to miss the awakening of the tuber, which begins with the end of February. His sign - the emergence of new shoots. Step-by-step instructions will help you understand how to plant tubers.
Step-by-step instruction
- As much as possible to clear a tuber from the old dried-up roots, leaving threads of the largest. Then new ones will grow from them.
- Determine where the tuber is the bottom and the top, so as not to plant it upside down (a small depression is in the place where the future sprouts appear - this is the top, on the opposite side there is a bulge - bottom, this side should be planted in the soil).
 Check the tuber for damage, rot, for this it can be washed. If damage is present, carefully cut them out and treat these places with charcoal or treat with a mixture of fungicide and “Kornevina”, leaving the tuber to dry for a day. This operation will help heal damage.
- Preparing a place. At the bottom of the pot lay drainage of foam 1-3 cm and poured on top of the prepared soil.
- Make a recess in the ground and put the tuber there.
- We fall asleep by 2/3, leaving the top of the tuber on the surface so that the soil does not get on the shoots.
- Water the soil around the tuber. Make sure that the water does not fall on the top of the tuber, where there is a concavity.
- After some time, when the tuber sprouts grow, it can be sprinkled with fresh substrate.
The normal rest period of gloxinia is 3-4 months. (about the features of wintering Gloxinia can be found here). However, some plants need more time to start a new growing season.
How to wake a tuber if it shows no signs of activity for a long time?
- The washed, inspected and dried tuber is put in a tight-fitting bag and a slightly moist peat substrate is added.
- A closed bag is kept warm (under diffused sunlight or phytolamp). It is important to remember about the light and temperature necessary for the normal development of the plant (see above).
- After about 14 days, drops appear on the inner surface of the film, and on the tubers there are kidneys ready to grow. This indicates that it is ready for planting.
We offer to watch a video about planting gloxinia tubers:
How to plant seeds?
- Seeds are planted on the surface of wet and loose soil. Deepen them in the ground is not necessary. There is no need to choose any particular substrate. You can use peat tablets.
- The soil must be sterilized.
- The capacity is preferably shallow, and the soil layer is up to 3 cm, since the seedlings swoop in the process of growth.
- After the seeds are evenly distributed over the ground, they are sprayed from a spray bottle and the container is tightly covered with a film so that moisture does not evaporate and placed in a warm, bright place.
Already after 7-10 days, small shoots start to be seen on the ground surface. Further actions are regular watering and, if necessary, picks.
Read more about how to grow gloxinia at home from seed, read here.
We offer you to watch a video about growing a flower with seeds:
How to care after transplant?
 For proper care after transplanting the plants, the following recommendations should be taken into account:
- Gloxinia is a plant of a long daylight, therefore, to obtain a strong, abundantly flowering plant, it is necessary to provide good lighting in diffused light. But do not expose it to direct sunlight, the flower may overheat.
- During the germination of the tuber, the air temperature should be slightly above 25 degrees, to accelerate the growth of young shoots. But do not reach 28, as the plant ceases to grow.
- Need increased humidity.
- Produce watering need warm water. Be sure to monitor the uniformity of irrigation so that all parts of the root receive their portion of moisture.
- The room where gloxinia grows should be regularly aired so that fungal diseases do not form. But you can not allow strong drafts. About diseases and pests of Gloxinia, as well as methods of dealing with them, read here.
- When the flower is rooted (15-20 days), you can make feeding. Before flowering, it is better to use those that contain nitrogen.Before you use top dressing do not forget to pour gloxinia.
To learn how to properly transplant and grow Gloxinia, read here, and from this article you will learn how to properly water and feed the plant.
Video instructions for the care of gloxinia:
Conclusion
To grow a strong and healthy gloxinia, you need to put a lot of effort, but the result is worth it. Do not forget to pay due attention to the plant.so that this southern flower could please the eyes of others and yours for a very long time. These recommendations and a step-by-step guide will help you plant and care for the plant properly, and Gloxinia will surely give you a lot of lush flowers.


 Check the tuber for damage, rot, for this it can be washed. If damage is present, carefully cut them out and treat these places with charcoal or treat with a mixture of fungicide and “Kornevina”, leaving the tuber to dry for a day. This operation will help heal damage.