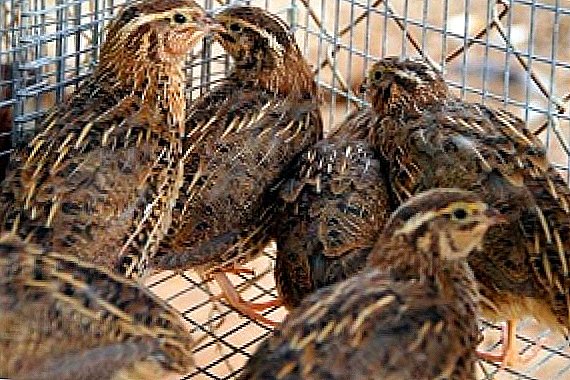
Breeding and growing quails at home is a very profitable business.
After all, these small birds consume very little food, but at the same time they egg very well and give even a small amount of meat, but it has a very great value.
Keeping quails is absolutely no difficulty, since they can even live in a house, if you build a special cage for them.
Exactly how to do this will be the article below.
We will try to share with you not only the main variants of the cells, but also to stimulate our own creativity, acquainting you with the main requirements for its construction.
What a cell should look like: familiar with the main requirements and criteria

It would seem that the birds in the house - it is a constant stench, dust and stale air. But, in fact, all these unpleasant factors are very easy to avoid if you choose the correct design of the future cell.
With that, it will not even have to be bought, but it’s quite realistic to make it yourself with available and inexpensive materials.
In general, if you deal well with the requirements that are put forward to such cells, then it is possible without any further clarification to build the right one for you. Below we will acquaint you with such criteria.
- It is very important that the quails in the cage have enough space for life. Therefore, its size should be based on the calculation of 1 individual per 100 cm2.
You can certainly leave more space, but think about whether it will be beneficial to you yourself?
- Placing too many individuals in one cage is also not worth it.
Firstly, it will be necessary to construct just a huge cage, and secondly, a large concentration of birds in one practically confined space can adversely affect their health and egg production.
- Do not forget about the so-called "egg assembly" - that is, the sloping floor, through which the eggs will roll out for easy collection.
In this case, the height of the back wall will reach 20 centimeters, while the front one will be 5 centimeters more. But at the same time for all, the angle of inclination for the assembly of eggs should not be more than 8-10ºС, otherwise the birds will also roll down.
- The egg-picker itself must protrude in front of the front wall of the cage, and 7-10 centimeters will be quite enough for this, it is also necessary to attach bumpers to it, otherwise the eggs will roll down and fall down.
- The most popular way to make cells is to use wire mesh. However, it is necessary to take into account the width of its cells, since the quail is a very small bird, and without problems it will be able to get out through large openings. Therefore, to acquire a grid with cells greater than 1.2 to 1.2 centimeters is not worth it.
The diameter of the wire, which will depend on the strength of the cell, can vary from 0.9 to 2 millimeters.
- It is very convenient to combine in the front wall of the cage and the function of the door. For this, it is attached to the main structure with special loops, or with simple pieces of wire. This will greatly save space.
Getting Started to Build a Cell: Basic Directions
Pros and cons in choosing the most popular materials for the manufacture of cells
Before proceeding to the direct manufacture of the cell, it is important to choose a material. It is necessary to proceed in this matter from the fact that it will be more accessible and cheaper for you personally, since each material has its own advantages and disadvantages.

If you decide to give your preference to a metal cage made of galvanized steel rods (although using a conventional aluminum or dural mesh is quite good result), then first of all you will win in the durability of such a design.
Also, a metal cage is considered the most hygienic, since it can be very easily disinfected with fire, a blowtorch, or simply boiling water. In addition, the cell will be obtained from solid lattices, which will allow sunlight to completely fill the space of the cell.
However, it is also quite it is acceptable to make wood cages or to combine wood with metal. It is recommended to use beech, birch, maple or oak wood as a material.
With regard to this option, the aesthetics of the cells, the springiness of the material will be an advantage, they fit very well into the interior, which certainly cannot be said about metal cells. However, wooden and combined have much more deficiencies:
- Wood can not be treated from pests using fire, and the use of other disinfectants will also be virtually impossible.
- Often dampness accumulates in wooden cages (after all, they do not dry as quickly as metal ones), as a result of which parasites can build up in the corners.
- In the combined cages, it is impossible to contain those breeds of quail birds that have hard beaks, as they can damage it.
What should be the scheme of the cage, convenient not only for birds, but also for the house?

When you start practicing and really take up the production of a cell, you cannot make it exactly “in line”.
After all, it is not always possible to bend the grid in the same place, or to find the right size of the board.
But still, according to the recommendations of masters experienced in this business, the largest cage for these birds (that is, for 30 individuals) should be 40 centimeters wide, and 1 meter long. At the same time, if meat breeds of quail are grown, or meat-breeding, then 5 centimeters should be added to the width and length.
At the same time, do not forget about the egg outlet, which will also take up some space (we have already described its dimensions above).
However, for the convenience of the cage itself, it should be made not so big, naturally launching not 30, 20-25 individuals of quails in the future.
In this case, the cell is obtained in dimensions of 72 by 52 centimeters, well, or 28 by 20 grid squares, if you have given the advantage of the metal construction.
But it is even more convenient to manufacture not individual cells, but entire racks, where each cell is installed one above the other with the help of special fixings.
Thus, it is possible to make the simplest rack with a height of 1.95 meters, a length of 1 meter and a depth of 60 centimeters (together with the length of the egg acceptor), which can easily accommodate between 150 and 200 birds and does not take much space. With all the parameters taken into account, it will contain 5 cells.
The main stages and features of the construction of cells using wire mesh
Preparation of materials necessary for cell construction

We will build the most practical cage for 25 individuals of quail, for which the easiest way is to choose materials of the required size. Therefore, we purchase the following materials:
- Metal mesh with a width of one and a half meters and with a cell size of not more than 2.5 to 2.5 centimeters. It is most practical to choose a rod diameter of 1.8 millimeter.
- The grid is made of the same material, but already 1 meter wide and in smaller cells - 1.2 by 2.4 centimeters. Without problems, such a grid can be found with a diameter of 1.4 mm in a twig. It will serve as a cell floor, which explains such small cells.
- For the pallet, you need a piece of galvanized sheet, which can be picked up after the basic structure has been built. Thus, it will be possible to pick up a piece of a specific size, without wasting any money or materials.
- To firmly fix the floor you need 6 plastic screeds.
- Metal profile, produced specifically for work with drywall. It will serve as a feeder for our birds. And as a drinker the most economical option would be a regular plastic bottle.
Getting to the manufacture of cells: a step by step description

- We take our grid of one and a half meter width and cut off a piece of only 20 cells in length from it. We count from both ends of the resulting piece of 16 cells and bend the grid so that the letter P. turns out. It is most convenient to bend it on the cells themselves, and not on their intersections.
- It is important to note that the piece is not cut strictly along the cells, but the ends of the rods are left on purpose. They are very convenient for fixing the back wall and the floor of the future cell.
- We attach the floor to the received frame, for which we need to cut a piece approximately 72 centimeters wide from the meter grid (naturally, it is better to try on a little so as not to be mistaken). Most often it turns out a piece 60 cells wide. Do not forget to leave the ends of the twigs, after bending which the design will become more durable and reliable.
- From the resulting piece should bend the back wall. It will turn out somewhere in 16 centimeters (6.5 mesh cells).
- Using the remains of twigs sticking out of the net, the back wall is attached to the main frame, and behind it the floor to the side walls. In the process of fixing the floor do not forget that for rolling eggs it should be slightly inclined. That is, if the back wall turned out to be 16 centimeters high, but the front wall should be about 19 (= 7.5 cells).
- From the rest of the floor grid, which protrudes in the front, we make an egg collector according to the parameters already mentioned above. The main thing - do not forget about the sides, which will save the eggs from falling to the ground.
- Fix the floor to the walls with plastic ties.
- In order to make the front wall, which will serve as the door, we need a piece of mesh 6 to 28 cells. We cut it off from the one-and-a-half meter grid, where the cells are larger.
With the help of separate pieces of wire or with the help of protruding rods we fix the received piece to the front. We also hang the floor to this front wall-door by taking individual pieces of wire, which in the future without problems can be bent back to open the cage.
- The door can also be made on top of the cage, cutting out a piece of 6 n8 cells from the "ceiling" and conveniently securing it. However, in this design, the cell is not suitable for shelving.
- We make the pallet, having previously folded the sidewalls for its fixture by 45º. Next, take a sheet of tin measuring 80 by 60 centimeters, bending all sides to the desired size: three sides are bent up and one (front) down.
- We make a bottle and a feeding trough from the bottle and profile, fasten it to the cage with the help of a wire.
- Such a cell can be used immediately, although it is best to treat with a disinfectant solution.
We build a cage for quail from plywood

Wooden or plywood (which is much cheaper) cell is built absolutely according to the very schemes and principles, as the above described metal.
The only thing that the floor in any case should be from the grid. However, such a cell has its own special requirements. First of all The material used must be impregnated with an antiseptic or quality varnishwhich is water based.
Precisely such measures will prevent the accumulation of dampness and the appearance of various bacteria.
Feeders are usually mounted on a cage in front, and on the sides - drinkers. They can also be made independently, if of course you do not rely on the aesthetics of the future design.
For practicality, such cells are also strongly recommended to cover the newspapers, because when the pan is taken out, everything around you can become dirty from bird feces.
As a result, you should have a rather attractive cage, but you will need to keep it always in front of the window in order for the birds to get at least some sunlight.
Another disadvantage of using wood and plywood for making cells is the weight of the resulting structures, which will be quite difficult to transport, especially with the birds inside.
It is also interesting to read about the construction of the house on your site.
How to get rid of traces of quail in your home: practical advice
On the one hand, it’s practical to keep these birds in the house, since you don’t have to come up with special devices for heating the cells, but on the other, it’s very troublesome, because an apartment or house can unpleasantly smell birds and be dirty.
But even these problems can be dealt with if they are foreseen in advance.
How to ensure the house freshness, if it live quail?
First, it will always have to clean the cell trayon which all their waste is collected. It is best to do this 1-2 times a day, rinsing it with some odorless disinfectant (so as not to harm the birds).
Secondly, as well as for cats, you can use regular filler for keeping quails, the effect of which you will notice immediately.
Thirdly, the use of two pallets is the most effective way to control odors from birds. By placing one under the cage, you can wash the other one and put it on the street for airing.
It is especially important to do this when a wooden pallet is used, into which the smell is especially absorbed.
Simple device to combat crumbling feed

Another problem that arises when keeping quails is feed scattered around the cage. After all, these birds are very active, and are constantly looking for the best food.
At the same time, if you give them the best food - the result will be the same. Therefore, over the feeder, you can simply install a grid that will prevent the birds from being bred in it.
Thus, you will ensure not only cleanliness, but also feed savings. Such a reticulum can be made in the form of a house, which will make it possible not to take it out even when falling asleep feed.
But, of course, once a week the feeder will still have to be cleaned from the remaining husk in it.
We struggle with dust which settles in the house from compound feed
On the one hand, the easiest way to solve this problem is to feed the birds with wet mash, rather than with dry feed. But the trouble is - not always enough time to make them.
In this case, only help use of special dust collectors. They are prototypes of anthers, which are used in cars and attached to the windshield.
With all this, you can make such a device yourself: take a grid with very thick cells and stretch it on a specially prepared frame, the dimensions of which should be twice the size of the cell. If such a frame is put on the cage, it will completely absorb all the dust.
The only thing - periodically this dust will have to knock out from the frame itself.
Another advantage of using the described frame as a dust collector is that if you keep it constantly wetted, it will affect the increase in humidity. This factor is especially important for the birds themselves, which, when dry, begin to break and fall feathers.