Everyone knows that agricultural work is a difficult job. But in fact, proper planning of the site, the use of modern technologies and the latest techniques for arranging the beds can make this activity much more pleasant and, more importantly, more efficient.
A garden bed is a small plot on which certain plants are planted. The use of the beds is not a prerequisite for obtaining the harvest, you can plant plants haphazardly and intermingled, and there are people who consciously use this option. It may sound strange, but in reality this method requires much more effort and, most importantly, knowledge and experience in the field of agricultural engineering, so novice gardeners are strongly urged to grow vegetables in the beds: it is easier to care for them and plan crop rotation on the site ( crop rotation).
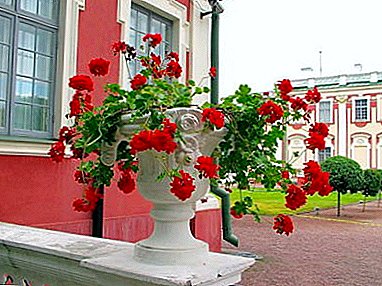
From where and how the bed will be located, what form and filling it will have, ultimately depends not only the appearance of the site, but also the harvest, which will be removed from it. And this means that equipping the right garden with your own hands means making it easier for you to continue working on it, improve your mood and increase self-esteem.
Kinds and forms of beds
 There are many types of beds. They can be stationary and temporary, traditional (horizontal, narrow and wide) and more progressive (multi-tiered, warm, high, deep, fast, etc.). Choose the most suitable option for yourself, depending on many factors - the size of the site, the characteristics of its location, the crops that are planned on the garden to plant and, of course, their own tastes and fantasies.
The shape of the beds can also be any - square, rectangular, trapezoid, round, figured. The use of different variations and avoiding the correct, "boring" plantings will help make the plot brighter, more original, and also more efficiently use the space reserved for the garden.
The main conditions to be adhered to, determined by the design of the beds, can be defined as:
- the plants in the garden should be comfortable;
- trampling over beds should be kept to a minimum;
- the location of the beds should take into account the climate and topography (for example, in low-lying areas it is better to raise the beds, and in a dry place, on the contrary, to dig deeper).
Horizontal
 Let's start with traditional horizontal beds. Usually gardeners approach their arrangement very simply: they divide the land into rectangular or square fragments and plant their favorite vegetables in them. In fact, this option is hardly successful, since it does not allow to fulfill the first two of the above requirements. It is much more technological to use narrow beds (0.5 m wide, on which plants are planted only in two rows).
Such a simple arrangement allows the culture to provide individual care and, in addition, full coverage, which ultimately provides a fantastic jump in yield. No wonder This type of planting was called the "harvest bed". Irrational use of land due to the obligatory in this case, the wide aisles is just an illusion, because one properly located plant will surpass the impenetrable thickets planted in the traditional way. But inside the garden beds, the crops are planted close enough to each other, this is one of the main secrets of the “crop bed”.
Did you know? More than a hundred years ago, scientists noticed an amazing effect: a dense planting at a wide distance between rows increases fruit bearing sharply: the plant tries to recapture the space from its neighbors and directs much more effort to produce fruits. Proper care of such a bed (and it is very convenient to provide it) and making the necessary dressings allow you to increase the crop four times!
Narrow beds have proven themselves when planting strawberries, nightshade (potatoes, tomatoes, eggplants, peppers), as well as cucumbers on vertical supports. In science, this method has been called the Mltlider method, it has equally proven itself both for arranging the beds in open ground, and in special boxes and greenhouses.
Narrow beds are also convenient to equip with sides, which will allow water and fertilizers to linger better around the plants and facilitate the approach to the row.
In addition to the width of the rows, the horizontal beds can also differ relative to their level. In particular, in addition to the usual beds, located flush with the site, there are deep and elevated beds.
As mentioned above, it is worth making deep (low) beds in the garden in those places that are experiencing an acute shortage of water. Also the indication is sandy drying soil with a small amount of fertile layer. On such a ground, the water lags poorly, and to prevent the soil from overheating, it is better to lower the bed a little.
On clayey heavy soils, especially if groundwater is constantly washing away them, in order to avoid stagnation of water and decay of the root system of plants, it is advisable to use high beds - structures that are several dozen centimeters above the site. These beds warm up a little faster in the spring and later cool in the fall, but this difference is rather insignificant.
Important! High beds require particularly careful monitoring of the retention of moisture in the ground, they should be watered much more often, because they dry out very quickly. Therefore, the use of such a structure should be really on the marshy soil, when it is caused by objective necessity.
The use of high and low beds only allows you to adjust the level of moisture in the soil, these types of beds do not have a direct impact on the design of the site and crop yields.
Another interesting type of horizontal bed is a warm bed. This term is called the filling of the area allocated for gardening, which provides natural heating for the plant. The option aims to replace the greenhouse in regions with very short summers. The idea is that before planting plants on a bed, manure or other organic matter is laid, which, when decomposed, begins to release heat and serves as a kind of heater for the roots. Warm beds are indispensable for unexpected frosts, sudden temperature changes, especially at the beginning of the season.
Vertical
 A vertical bed is a very original and convenient, albeit rather labor-intensive in execution, way of organizing a vegetable garden at a dacha. But if there is very little space for vegetables, this option can help solve the problem. An additional bonus for the construction of a vertical bed is that the plants planted in it do not have direct contact with the land on the plot, and therefore do not experience the harmful effects of weeds and are less susceptible to the defeat of fungi spores. In addition, to care for such a bed is much better - no need to bend in three deaths, everything is convenient and affordable. Finally, with the help of such a bed you can effectively “close a hole in the wallpaper” - to camouflage an old fence or a peeling barn wall.
It has a vertical bed and a number of drawbacks. First of all, a small amount of land in which the plant is located, drains it more quickly and drains it, so these beds should be fertilized and watered more often. In addition, plants on such beds are much harder to tolerate the cold winter, because the land in them is more frozen.
Very often strawberries are planted in vertical beds (they can be arranged even on your balcony), but this option is also suitable for greens, salads, cucumbers, tomatoes, zucchini and other vegetables. They are simply planted in the boxes with the ground, and then put the boxes on the previously nailed shelves or suspended from special supports.
You can build a vertical bed for strawberries with your own hands from scrap materials. To do this, you need two plastic (for example, polyvinyl chloride) pipes of the same length, but of different diameter. Narrow is intended for organizing drip irrigation (a large number of holes should be drilled in it immediately), wide - for planting strawberries.
The bottom of one and the other pipe must first be sealed. Further, the principle is as follows: a narrow pipe is wrapped with sacking or agrofibre, tied with a twine, after which it is inserted into a wide pipe in which holes are preliminarily made for strawberry seedlings with a diameter of about 5 cm. and then - fertile soil mixed with foam balls or hydrogel for better ventilation and to avoid subsidence of the soil. Then the construction is fixed (you can build several such pipes and attach them to each other with a “hut”. Strawberry seedlings are planted in the holes, then water is poured into a narrow tube. A vertical bed is ready!
For climbing crops, a vertical greenhouse can be constructed from metal barrels. With proper care, this method allows to solve the problem of arranging supports for this type of crop - growing up, they will hang down and braid the barrel. Convenient and very impressive, because the beautiful beds in the garden - the key to a good mood of its owners!
Stacked
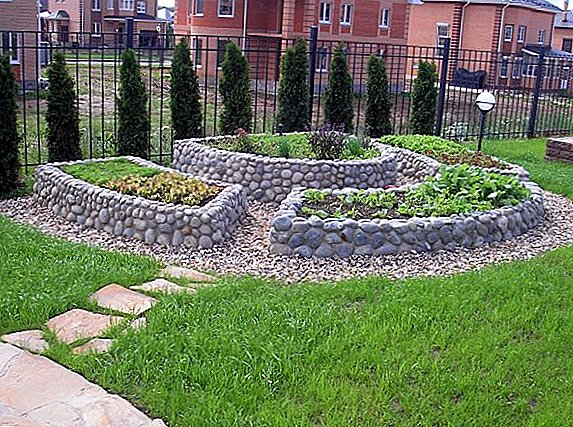
 Another option of beautiful beds, which can be arranged in the country with their own hands, is a multi-tiered beds. Very convenient option in terms of space saving. Such a bed is created according to the principle of a multi-storey building, when several apartments instead of one are located on the land plot above each other.
The device of multilevel beds at the dacha is the real creativity. First of all, you need to plan which cultures and in which order they will "live" in your high-rise building. It is necessary to take into account the height of the plants, the features of their growth and development, the requirements for lighting, the fruiting period, etc. For example, it is not very convenient to locate the tallest plants on the lower "floor", since they simply have nowhere to develop. It is also better for the most light-loving crops to leave the upper areas. Climbing plants, depending on your imagination, can be planted below, guiding the stems upwards along specially provided supports, or, conversely, placed at the top, allowing them to go down along the walls or other elements of the structure.
From what to make multi-tiered beds and what place on the site to use for their arrangement, depends only on the owner's imagination. For this purpose, ready-made or self-made ladders, frames knocked out of planks or round structures constructed of plastic rings, bending pipes and any other material at hand are suitable.
Registration of beds in the country with the help of hand-made multi-storey structures has a number of undeniable advantages.
First is very ergonomic. Caring for such a bed is not connected with a constantly bent back, you can feel comfortable, while at the same time it is convenient to approach the plant and perform any necessary procedure with it (tie, pin and finally harvest).
The second is economically. If you are limited in space, this method will allow you to grow the maximum number of crops in a minimal area, and the vacant space can be used for arranging a recreation area or a barbecue.
Third is effective in terms of agricultural technology. With proper planning of a multi-tiered bed, you can actually grow both sun-growing and shade-tolerant crops very successfully on the same segment of the site, and both will give you a wonderful harvest.
And finally, fourth, this very beautiful and original. Multi-colored vegetables and fruits and fragrant greens, a bright ensemble located in the form of a living pyramid, is an unconditional reason to invite your neighbors and acquaintances who will certainly appreciate your resourcefulness and creative approach.
Multi-tiered beds are also a great way to arrange an original and very beautiful flower garden. The principle is the same - flowers resistant to shade are planted below, and more light-loving and waving are placed on the upper tiers.
How to choose the right place for the beds
Determining the type and shape of the beds, we must not forget that it is equally important to choose the right place for its arrangement.
 The first thing you need to pay attention to is the lighting of the site. You can not have a bed in the shade. The sun should light it at least eight hours a day. This is a general rule. But there are nuances depending on which crops you are going to plant, since different plants are differently demanding of sunlight. In addition, it is better to maximize your bed lit in the morning, was a little shaded during the day and again turned out to be in the sun in the evening. From this point of view, you need to place the beds away from tall trees, buildings and fences that cast a lot of shadow.
Important! For photosynthesis, the most favorable is the morning light, when the sun does not burn, but gently caresses the green leaves. Evening rays do not effectively affect plants, and the midday heat can cause a lot of harm.
If you decide to build a multi-tiered bed, the amount of sunlight and the need for it of certain crops should be taken into account.
The second moment is relief. It is better that the bed is flat, so that the water lingers in it evenly. Lowlands and elevations should be avoided if possible, since in the first case the water will heat the roots, in the second - the plants will dry out. Although this problem can be solved by arranging high or deep beds, as was mentioned above. However, the presence of a slope is a reason to choose another place or level the plot, filling the required amount of land. Also on an uneven plot you can equip terraces with vertical beds, then the soil will not be washed out after each rain and watering. The last option is to plant a plant across the slope.
 If the plot is uneven, position the garden beds on the south side. It is noticed that in this case the unfortunate relief can be compensated by greater sun activity, and the harvest will ripen much faster. The northern uneven slope is the worst place for a bed.
Now about the location of the beds. It is believed that the beds should be settled from north to south. But this is a general rule, and it does not always work. So, for undersized crops and a flat plot, really, you should follow this direction of the beds. But tall plants are better to plant from west to east, this will ensure the most uniform illumination of each bush.
ABOUT form of beds we have said. The place must be chosen so that between the rows you can leave a wide (at least 0.5 m) space - a path along which you will walk, taking care of the plants. This place can be easily tamped (and even covered with gravel or sown with grass), so as not to knead the dirt after rain or abundant watering. The length of the beds depends on the characteristics of your site, but it is better that it is the same for all rows - it is more convenient to take care of the plants.
A few tips for choosing a place for the beds, depending on the crops that you plan to grow on them:
- To save space, radish, lettuce and dill can be used to compact beds with other crops (for example, with cabbage), instead of allocating a separate place for them;
- root crops are recommended to be used as a frame for planting vegetables, and it is good to use climbing plants, such as legumes, as a border. If you plant them north of the main crop, they will not obscure it;
- Zucchini, melons, watermelons and pumpkins should be planted separately from other vegetables, as they require a large amount of space and can overwhelm the neighbors.
 In general, we can say that the correct device beds in the country will allow you to literally grow a crop on one weave of land, which will fully provide the whole family with fresh vegetables and allow you to create impressive reserves of vitamins for the winter.
How to make a bed with your own hands
How to refine the beds with your own hands, depends on what kind of bed you have chosen. If it’s not a primitive horizontal bed, but a more complex and progressive design, There are two main options:
- purchase ready-made beds for summer houses, which you will only need to assemble and install;
- independently make the conceived design.
Что понадобится для создания грядки на даче, инструмент и материалы
В качестве основы для создания различных прогрессивных конструкций можно использовать что угодно - пластик, плитку, солому, дерево, трубы, готовые ящики или бочки, шифер, кровельную дранку и т. п. Any selected material has advantages and disadvantages that must be considered before making a choice.
Important! When arranging beds for vegetables and fruits, it is imperative to use materials that do not emit harmful substances. For example, automobile tires, cinder blocks, slate, as well as wooden parts treated with non-food dyes and varnishes should be used to equip flower gardens, but not for planting plants that are eaten. In extreme cases, the use of such materials with a preliminary wrapping them in a special film intended for garden work.
So, for arranging beds you can use: 
- tree - boards, logs, timber: it is affordable and relatively cheap, suitable for any beds, the only drawback - wooden beds for the garden are short-lived;
- twigs and vine - woven designs look very impressive and, if you have your own raw materials, can do it completely free of charge; however, such material also will not last long;
- straw - it can be used in tamped bales, it costs almost nothing (when self-harvesting), however, in addition to its fragility, it has another drawback: in this material the larvae of various pests can be preserved, as well as the seeds that will germinate by weeds. Therefore, straw can be used with care, so that it is separated from the soil where the root of the plants is located;
- a rock - it looks very beautiful and costs a long time, however, as a rule, it is a rather expensive pleasure;
- brick - well suited for arranging high beds and, with the ability to handle it, it looks great; However, if you do not use old stocks or used material, such a bed will be unnecessarily expensive;
- plastic - well is suitable for arrangement of high beds, very durable, easy to use and inexpensive material. The disadvantage is that not all types of plastic are suitable for contact with food;
- metal - sheets, pipes, strips, rods, as well as finished barrels, etc. Convenient, durable, durable, but requires welding, which is not available to everyone. Disadvantages - high price (if you do not use the existing residues), in addition, by corrosive, it can adversely affect the soil, therefore, metal parts must be wrapped with film.
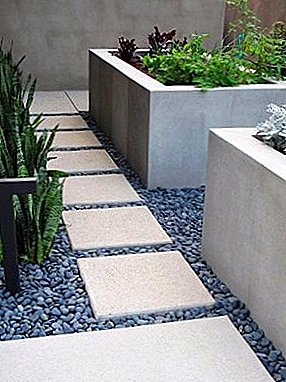
- concrete - prefabricated or self-molded structures. It is convenient to use to create multi-tiered beds located under the walls of the building. It is strong, durable, looks quite beautiful. Among the shortcomings, one can single out large labor costs, high price, stationarity (such a bed cannot be moved to another place), as well as the fact that not everyone likes to fill in a "living" piece of land with concrete, from which one so desires to rest, having escaped from the city.
- glass - the beds collected from the bottles planted on cement solution look quite esthetically and in an original way. If the available material is available, the bed will be very cheap. The disadvantage is that the glass may break.
- galvanized mesh - durable, comfortable, are not very expensive, but can adversely affect the soil.

How to build a bed in the country with their own hands, step-by-step guide
Let us consider in more detail the technology of arrangement of high, multi-tiered, fast and warm beds.
Raised (high) garden bed from boards in the country is done as follows.
 For arranging the bottom row, first of all, around the perimeter of the bed, you need to remove the turf in width corresponding to the size of the board. The site itself is freed from debris and weeds. Then the boards are laid out on the prepared strips, and it is very important that the whole structure is on the same level (if necessary, an additional plank should be placed in the “sagging” places or, on the contrary, some ground should be removed in the highest places). Rubber hammer boards are fitted close to each other, so that between them there are no gaps. Then the design is fastened with screws.
Then we increase the construction of several rows of boards. It is better to secure subsequent rows overlap, so the construction will be more sustainable.
At the bottom of the resulting space, first lay a layer of agrofibre or metal mesh. This will protect the future planting from weeds and rodents, as well as protect it from pests and fungal diseases. To protect the soil from leaching, a layer of regular cardboard can be laid over the grid and only after that the drainage can be filled. If there is no screening or rubble, you can use broken brick or other suitable material.
Important! Do not lay a film on the bottom of the bed. In this case, the earth may overheat and, moreover, the lack of access to soil by earthworms and other microorganisms necessary for normal life of the plant will have a negative impact on the harvest.

It's time to fill the bed with fertile soil. If you can not buy ready-made mixture in the store, you can use the soil from the site, thoroughly clean it from the roots and weeds and, if possible, mixed with peat or compost. The sides of the beds should be 3-4 cm above the soil layer. After transplanting the soil, it is recommended to soil the soil, this will protect it from freezing and drying.
The bed is ready, it remains to take care of the irrigation system and, if desired, organize a paved blind area around the building.
Such a bed can be equipped not only on the open ground, but also on the concrete ground. In fact, this option is even easier, because it is not associated with the need to get rid of sod and weeds, and, moreover, the blind area around the garden is ready for you!
Did you know? It is not recommended to treat wood for arranging the beds with antiseptics for environmental reasons, therefore, to increase the service life of this design, it is better to use decay-resistant varieties of trees, for example, oak.
Using the principle described, a high bed can be made from any other available materials.
 Now consider how to do tiered garden bed from the boards with their own hands. Here, the task is more difficult, in particular, much more time needs to be given to proper marking, clearly defining the boundaries of each tier, in order to properly plan their width (here it is necessary to take into account varieties of planted plants, since each of them requires a certain amount of personal space for normal development).
The lower tier, the largest in area, is preliminarily protected with a net and cardboard; subsequent ones can be done without observing such precautions.
Filling of beds is carried out taking into account the needs of their future inhabitants to the composition of the soil.
On the top floor of a multi-level bed you can arrange picturesque designs from woven branches or bamboo sticks, which will be used as a support for climbing cultures planted on this tier.
Arrangement quick beds of straw - A great option for untreated and weedy plot.
The area allocated for bedding is covered with cardboard (it is recommended to fasten it with studs so as not to be carried away by the wind), a layer of straw is laid on top (not less than 30 cm) and we plant our seedlings, making cross incisions in the cardboard with a knife. Well, if under a layer of cardboard lay manure, compost or other organic matter.
This bed prevents the development of weeds (they can not break through the thick layer of paper) and does not allow the soil to dry out.
Fast straw bed - A great way to grow potatoes.
 And finally warm bed It can be done in three ways - on uncultivated land, in a box or in a trench. In the first variant, the place chosen under the bed is enclosed with boards, a layer of wood chips is laid on the slightly trampled grass (waste can be used after winter trimming of trees). The branches are covered with three layers of paper (suitable for cardboard, newspapers, packing material, etc., freed from the scotch tape). Then the hot-water bottle itself is placed: humus, compost or manure with a layer of at least 10 cm. It should be covered with dry grass and left until next spring, regularly watering during the summer. When the time comes, pour a layer of soil mixed with humus (another 10 cm) over the grass and plant the seedlings.
Did you know? Before planting, it is recommended to pour warm water over the prepared bed and cover it with film, this will accelerate the beginning of the decomposition of organic matter.
Similarly, a warm bed can be arranged in a previously prepared wooden box; its sides must be at least 30 cm high.
The service time of such warm beds is not limited to one year, however, “biofuel” does not work for more than three seasons. But there is a way to build a self-heating garden, which can last up to ten years. The task, however, is quite laborious, but worth it.
A trench is being dug for at least two places on the bayonet of a shovel. At the bottom fit wood material: larger in the center and shallow at the edges. If the soil is clay, you first need to pour a layer of sand into the trench, and in particularly cold regions - lay empty plastic bottles to create an airlock. From above the turf is laid out with its roots up, then a wooden box is installed, filled to 2/3 with dry grass and paper. The top layer is the soil mixed with manure or compost in a 1: 1 ratio. This bed should stand at least a year before it will be planted culture.
One of the main conditions under which a warm bed “works” is constant watering.
 To finish the description of ways of arranging the beds in the summer cottage, I want an important rule that is often ignored by the gardeners. The shovel is the main enemy of your bed! No need to dig the ground, it is very ungrateful to such a procedure! Work with your hands, and the result will not take long. And one more thing: whatever form of bed you choose, try to make so that stamping on it with your feet is minimized. A bed - for plants, for the person - paths!