Practically every summer resident has his own cellar at the site. And those who do not have it, probably, have more than once thought about building such a room. Storage of conservation in the cellar has long been practiced by people. Therefore, in this article we will tell you about how to make a cellar with your own hands without the help of builders.
Requirements for the cellar
In order for the cellar (glacier, underground) to function normally for a long time, the following requirements should be attached to it:
- Constantly low, stable air temperature. In the glacier, the temperature should be more or less constant throughout the year, regardless of whether it is summer outside or winter.
- Blackout. In the basement is not allowed frequent clarification. It is impossible to make windows in glaciers, and electric lamps can be switched on only in cases when you visit the underground. Some products that are in your cellar, for long-term storage must always be in the dark.
- Air humidity. It should be about 90%. This is a very important indicator, if it is very underestimated, there is a risk that some products will be spoiled. To control the humidity of the air using a psychrometer. If the humidity is too low, it should be increased. This is done by spraying water on the walls and scattering wet sawdust on the floor.
- Constantly clean and fresh air. To ensure the ventilation of the cellar, you need to properly design the supply and exhaust ventilation. This is a very important factor that will not allow air to stagnate in the room.

Did you know? "Cellar Auerbach" - One of the best wine restaurants in the world, which is located in Germany, Leipzig. The restaurant is a bit lowered into the ground, has its own wine cellar.With proper organization of work during the construction of this room, all the above requirements can be easily incorporated into the mechanism of the cellar. And then, after construction, you only need to control the humidity and lighting.
You will be interested to know how to store food in a plastic cellar.
What are the designs
There are more than a dozen different types of cellar designs. Each owner does everything in his own way. But there are long-established types of structures, which we will tell you about:
- Ground storage (storage shed vegetable). This type of construction is suitable for construction in those regions of our country where the soil has high humidity and groundwater is very close to the surface. It is believed that St. Petersburg summer residents invented such a construction, the soil conditions of which do not allow to go very low. Above-ground storage facilities go deeper into the soil by no more than half a meter, and have a frame structure on top.
- Ground cellar. This is another type of glacier, which is buried under the ground for no more than half a meter. The design of such a cellar is quite simple and does not occupy large areas on the site. Such storage facilities are constructed by people who have a limited amount of finances and a small area of the summer cottage. In addition, such constructions are built by all summer residents, whose site is located in regions with a high level of groundwater.
- Ground Cellar with Boning. The design of such storage is very similar to the construction of the glacier described above. The only difference is that this construction is constructed with the subsequent deboning of the earth. This is done to maintain the required level of humidity in the room.

- Semi-deep cellar. This type of construction is the most common on the territory of our country. The depth of such an underground is about one meter, which allows it to be designed even in moderately moist soils. The walls of such storage are poured with concrete and sealed with waterproofing. The overlap is made of slab, protected by a layer of roofing material or roofing material.
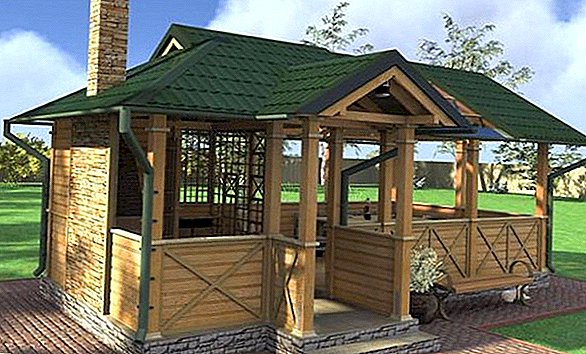
- Summer kitchen with cellar. Such facilities are very well suited to those who have a very modest plot in the country. The storage can be built right under the summer kitchen, leaving a hatch for entry. Construction robots should be carried out only with experienced people, otherwise there is a risk that the summer kitchen will collapse.
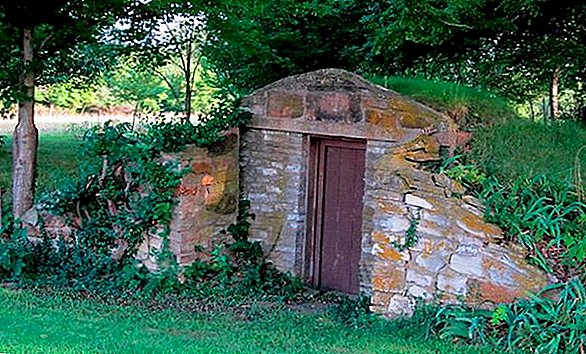
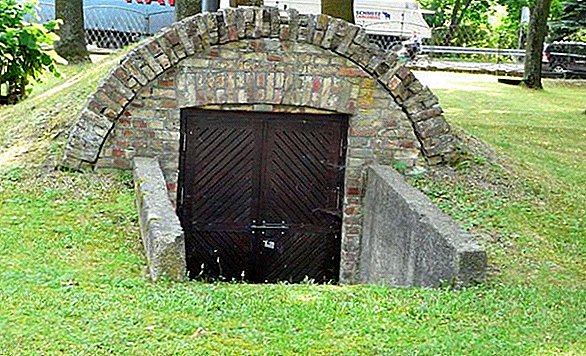
- Stone cellar. Storage of such structures today are extremely rare. They have already gone down in history, although some can still be seen in individual villages and settlements. The designs of such cellars are very complex and require careful and careful work. To date, there are very few craftsmen who can build you such a glacier. And he, by the way, has a good temperature, constant humidity and excellent ventilation.

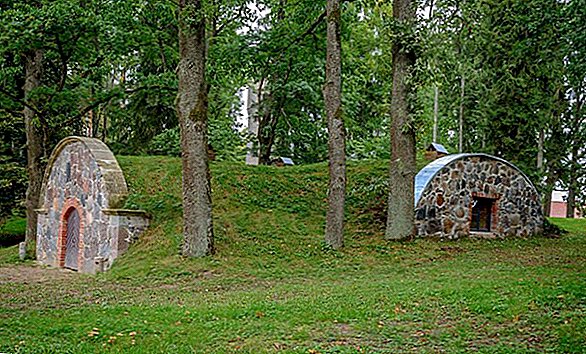
- Blocked cellar. Such structures are performed at two entrances. A blocked glacier is very convenient to construct for several families, for example, at the boundary between sections. So you can build one storage for two: for you and your neighbors. This saves territory and money.
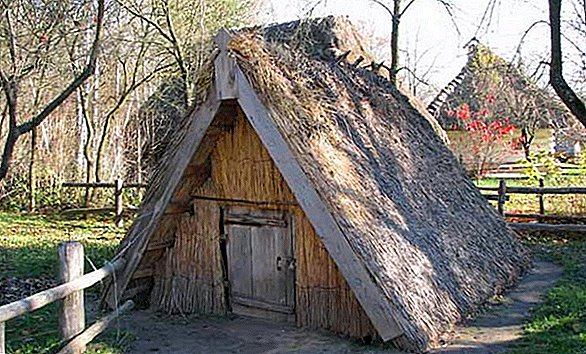
- Earthen cellar. Previously, it was very common in the territory of Yaroslavl Province, and therefore received the name of the people "Yaroslavl repository." The construction is performed completely underground, and the top is only covered with a floor stand or poles. This cellar is perfect for long-term storage of potatoes, beets and carrots.
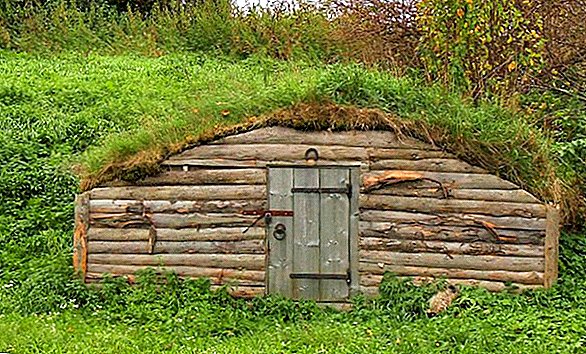


Important! The cellar is best built in the hot summer, when the level of groundwater is as deep as possible.And this is not all types of cellar designs. There are also: a cellar on a slope, a wall glacier, a Finnish glacier, a snowfield, a vault of reinforced concrete rings, a collar, a bath-cellar, etc. But most of them are intended for the same purpose. - storage of vegetables and pickles.
Learn how to make a summerhouse, which will be the most favorite holiday destination for the whole family.
Where is the best place to build
Before starting construction work, it is necessary to clearly and correctly determine the location of the future glacier. You must take into account all the properties of the soil (its composition, etc.), the level of groundwater and the depth of freezing.  Many characteristics will depend on these parameters, including those that we described in the first paragraph. And yet - the durability of the structure, which also directly depends not only on the quality of the building, but also on its location.
Try to choose a dry elevated place or a mountainside (small hump). This terrain will immediately ease the further problem of waterproofing. When building an underground storage facility, you need to clearly know at what depth groundwater is located.
We advise you to familiarize yourself with the rules of storage of corn, cucumbers, tomatoes, onions.Then it is necessary to make a start from this data: half of the cellar should be half a meter higher than the groundwater level. If the level of groundwater lies at a depth of 2.5 meters, then the maximum depth of your structure should not exceed two meters.
 Check the level of occurrence of water in various ways. The simplest of them: determining the level of the depth of water in a well nearby. If there is no well, then hole shafts or exploratory drilling are often used.
By the way, the method of exploration drilling immediately check the composition of the soil. If there is a lot of sand or clay in it, then it means that when building a cellar you will need to strengthen the walls more strongly. Sometimes, when examining the ground, floats are detected. The oars cannot be drained, it is impossible to build a cellar in their place.
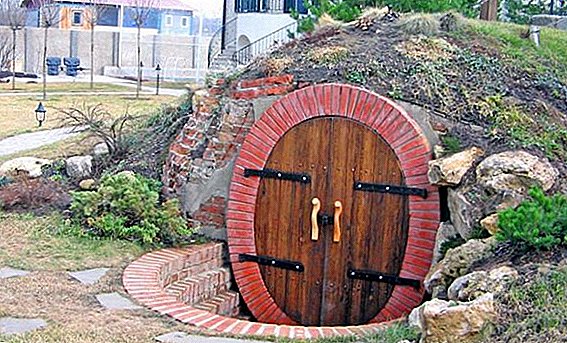
Did you know? One of the fans of the video game Elder Scrolls made himself a cellar-basement in the style of the above game. The design cost him 50 thousand dollars.It is also very important to determine the type of soil before starting construction work. From this will depend on the selection of materials and the nature of the work.
The most common types of soil: sandy, sandy, loamy and clay. To accurately determine the composition of the soil, you need to take 100 g of land and give it to an agrochemical laboratory for examination. But there is a way to accurately determine the type of soil without the help of chemists.  To do this, take a little earth and try to roll it into a thread, and then turn into a thin ring. If the ground does not want to roll into the thread, then you are dealing with a sandy type of soil.
If the primer has rolled into the thread, but the ring does not come out of it, then this is a light loam. If the ring goes out, but in some places produces cracks, it is heavy loam, and if the ring is perfect and without cracks, it is clay-type soil.
Also try to make a pergola on your own to improve your garden plot.Information about the depth of soil freezing is also very important for the future cellar. You will not be able to remove this data yourself, but you can easily get it from the engineering department of the administration or from a district architect.
Some types of soils with a strong freezing are able to expand by 5-10%, and this can adversely affect your structure and cause mechanical damage to it.  It is necessary to take into account the fact that at a depth of more than three meters the soil remains at a constant temperature (4-10 ° C) throughout the year.
Therefore, completely underground types of cellars most well maintain a constant temperature. In addition, the amount of precipitation in the form of snow affects the depth of frost penetration: the more snow falls, the less it freezes through the soil.
Find out how you can level the dacha yourself.
Build a cellar with your own hands
In this section we will tell you about how to build a cellar in the country with their own hands, the instruction will be as detailed and step by step as possible.
Necessary materials
As we have said, before you start building you should decide on the type and characteristics of the soil. The wetter the ground, the greater the thickness of the walls should be in the future cellar.  We will create walls of concrete and thick reinforcement (10-16 mm in diameter). Also, walls can be built of red brick.
Important! In a highly moist soil type, walls of foam or cinder block cannot be reduced. Such building materials are able to pass through a certain amount of moisture.The floor and foundation are poured from concrete, and to create it we will need: cement, crushed stone, sand, large stones (if desired, they are used to create stronger concrete), fittings and a concrete mixer. We will lower the concrete or its components into the pit of the future cellar, with the help of a special trough with sides.
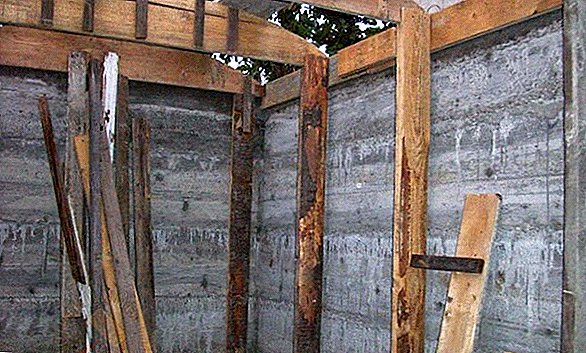
To adjust the solidification level of the foundation layer and the floor, we will use a special level to measure the angles on the plane. We also need handy tools: shovels, buckets, trowel, gloves, etc.  To gradually and layer-by-layer fill walls of concrete, we will need to make formwork from boards. Therefore, you need to prepare in advance the boards, which must be glued over with a film (so that the concrete does not stick to the tree).
As a waterproofing layer, we will use roofing material. We will fasten it to the walls by means of small rectangular boards (size 40 cm by 5 cm, depending on the width of the sheet of roofing material) and nails, as well as a gas lamp (the heated roofing material is perfectly glued to each other).
We recommend that you familiarize yourself with the rules for storing vegetables.The roof of the cellar will also be filled with concrete, but leave room for the hatch. The hatch can be bought in a specialized shop. To fill the roof of the glacier, we need to make a frame and formwork.
 For their manufacture you need: moisture-proof plywood (not less than 15 cm thick), strong beams for supporting structures (metal, wooden or concrete), supporting stands, wooden bars, knitting wire and construction fittings.
In addition to all of the above, in the process of work you may also need: a tape measure, a pencil, a handsaw, a Bulgarian, pliers, goggles, etc.
Also on your site you can arrange a beautiful front garden and decorate the area with a hedge.
Step-by-step instruction
To build your own underground cellar, follow these step-by-step instructions:
- Dig a pit. Its size will depend on the level of groundwater. If the waters are located below three meters, then the optimal pit size will be 2.3 m in depth, 2.5 m in length and width. If desired, the dimensions can be adjusted, but do not forget to add 0.5 m along the perimeter and 0.4-0.5 m in depth. This will be needed for concrete and waterproofing layers.
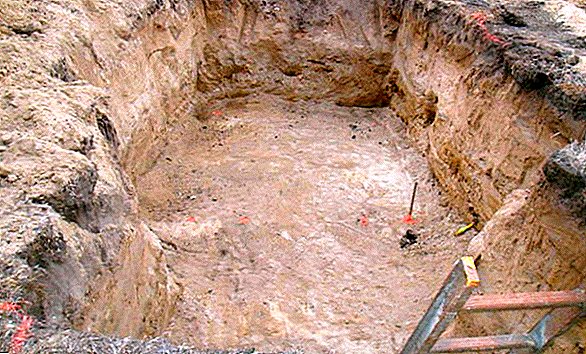
- After you have dug a foundation pit, its you need to tamp the bottom. Next, you should lay a gravel bed (you can also use crushed stone). The thickness of the pillow should be 0.2-0.3 m. The gravel layer should also be compacted and the reinforcement laid out on top. After that, the floor can be poured concrete.
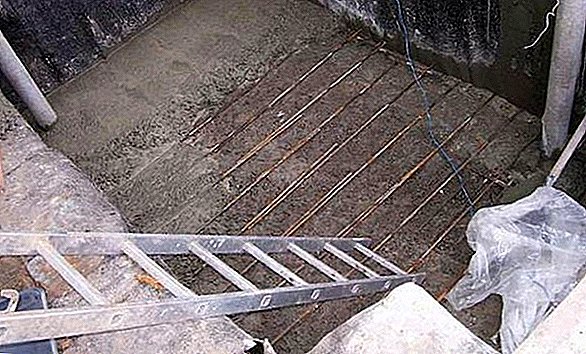
- The thickness of the concrete layer of the floor should be at least 20 cmotherwise there is a risk of mechanical damage due to the mobility of the soil masses (during severe frosts or small earthquakes). After the floor is filled, it must be protected with a waterproofing layer. For this it is best to use roofing felt. It should be laid on frozen concrete. Usually, the width of the cellar is greater than the width of the roll of roofing material. Therefore, it is necessary to overlap and glue the ends, using a gas lamp for heating. After the waterproofing layer, you need to pour another layer of concrete with a thickness of 10-15 cm.
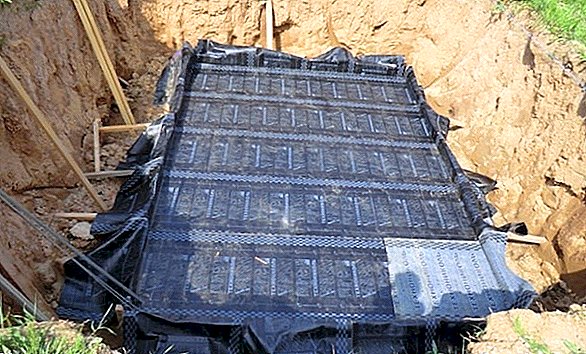
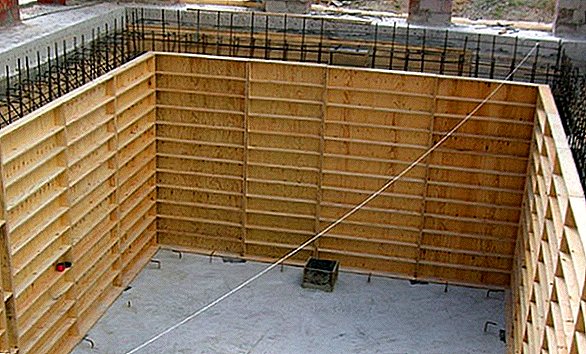
- Further, all the walls around the perimeter are lined with boards and covered with roofing felt.. The ends of the ruberoid plates are heated by a gas lamp, bent and attached to other plates. After the waterproofing layer is ready, you can proceed to the construction of concrete walls.
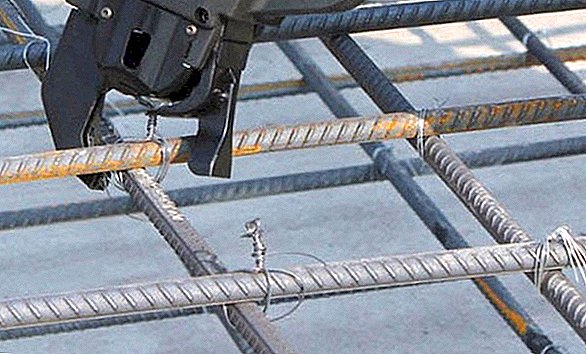
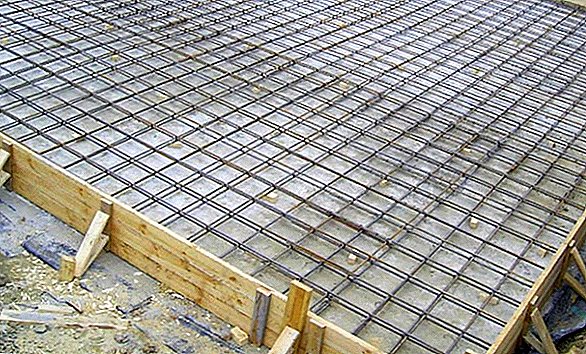
- To start you need to make a primary formwork and lay out reinforcing bars. The formwork should be made small, 15–20 cm in height (after the first layer is set, the formwork is transferred one step higher). Reinforcing rods need to be tied together by three special knitting wire. Next, install them vertically across the entire height of the pit. The distance between reinforcing bar groups should not exceed one meter. And ideally, the more fittings - the stronger the construction will be. Usually, the process of building walls can take a week or more, because the pouring takes place gradually, with constant movement of the formwork up. And the deeper your cellar, the longer you will build walls.
- When the walls are fully erected, you need to proceed to the final stage - making frame and roof formwork, and after - the formation of a concrete roof. But remember one important thing: the walls rise 15-20 cm above ground level.
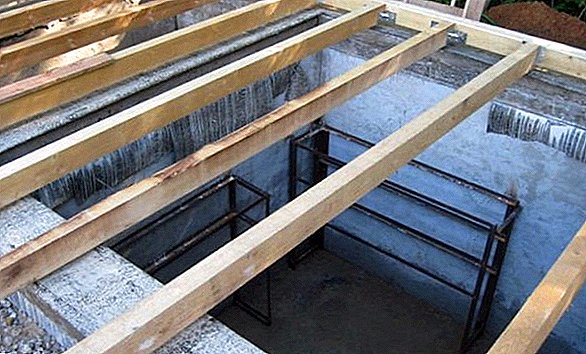
- Now on the walls you need to place bearing beams. The best fit beams with metal or concrete.
- Next you need formwork with waterproof plywood sheets. Formwork is done around the perimeter of the room. The formwork height should be 20-30 cm.
- After that you need form the frame of reinforcing wireswhich will lie perpendicular to each other, and fasten with knitting wire. It is important that the rods, which are laid underneath, leave the ends to the bearing beams. Also insert two pipes (special for ventilation in the cellar) on the opposite edges of the frame.

- Once the armature is laid crosswise, places of its intersection need to be connected by knitting wire. So the design will be more solid and durable.
- The next step will be pouring concrete into the finished frame.. Fill only in one direction, constantly compacting the concrete. When the whole frame is filled, let it harden and pour concrete over the water every day for the next week. So it will not crack.


Important! Apply cement, the mark of which is not less than 200. The construction of such concrete will serve you for many years.At this basic stages of construction are completed, now you know how to build a cellar at his dacha.
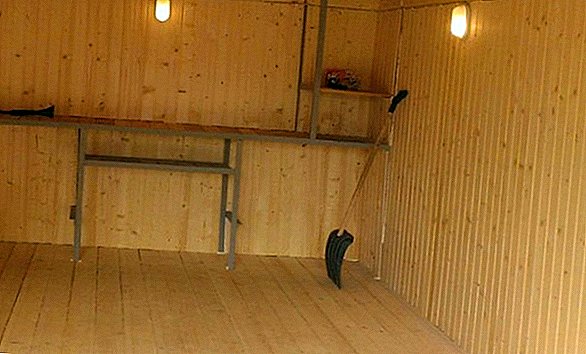
You will need to make a ladder to enter the cellar, conduct electricity there for the lamp (if necessary) and make a secret lock on the hatch.
It will also be useful for you to learn how to make a retaining wall at the dacha.The cellar can also be insulated with a layer of insulating material. With proper care of the glacier, it will serve you for more than a dozen years.