Thanks to its practicality, the greenhouse according to Mitlayder has recently won recognition from a significant number of vegetable growers and continues to do so further. Developed by a renowned American specialist in the vegetable industry, the greenhouse was named after its creator. For many decades, Meatlider has been engaged in a thorough study of agricultural processes.
Such a greenhouse gives a guaranteed protection to the plants, helps to create comfortable conditions for their growth, optimizing the temperature and humidity indicators. Subject to the conditions of high-quality fertilizer and technological processes of cultivation, the harvest will please every gardener.
Design features
In the construction of the greenhouse according to Mitlayder, the entire ventilation system was originally designed. The two parts of its dual roof are not interconnected, but placed in different levels. Free space between the slopes is intended for ventilation windows for the purpose of ventilation. This allows the air flow to circulate without creating drafts, which, in turn, allows the plants to develop favorably. 
Important! Cucumbers, for example, do not like drafts, if they are planted in such a place - do not expect harvest.In a typical greenhouse, the formation of air stasis, condensate, which, dripping on plants, causes their fungal diseases, dampness, which provokes the appearance of pests and the growth of bacteria, causes them to be damaged. All of this, it turns out, is easily avoided with the help of properly tuned ventilation, as presented in the Mietlider invention.
The air flows here through the vents in the side parts, filling it with the necessary carbon dioxide and oxygen for plants. The heated air in an ordinary greenhouse during this process, accumulating under the roof, does not have an opportunity to go outside, it goes into the “mitlider” room without obstacles through open ventilation windows. Many vents allow you to set the optimum temperature, maintain the level of ventilation and adjust this process.
If your hands grow from the place you need, if you need, time and resources, you can make a cellar with ventilation, warm beds, wattle, honey extractor, rock arias, multi-body beehive, garden shredder, mini-tractor, mower, arbor with your own hands .This greenhouse is very functional, because due to its height quite tall plants can be grown here, and the owner himself can be here to his full height. The construction is reliable, able to withstand significant snow loads and weather conditions of any complexity. Its elements on screws are conveniently and quickly assembled and disassembled and can be installed in another necessary place.

Choosing the right place
The choice of place for the installation of the greenhouse must be approached responsibly and abide by several not complex, but important principles. The site where you are going to install the facility should have free access to the sun's rays so that on a clear day there was no opportunity for the formation of any kind of unnecessary shadow, because enough heat and light is very important for plants, especially in spring and autumn.
The place must be smooth initially or it must be leveled independently. To do this, level the ground or use building material, for example, unnecessary pieces of paving slabs that are laid out around the perimeter of the structure. Another important condition: the building should be placed on the west side on the eastern slope of the roof, which is lower - to the south. This is necessary so that the ventilation windows in the roof face the sunny side, preventing cold northern air currents from getting inside.
Doors are hung in the same way: they must open on the south side, so that less cold air comes in. If you want to get the maximum benefit from the greenhouse construction, then you need to place it on the land plot according to these criteria.
Did you know? In the spring, eating greenhouse cucumber and masks from it will help avoid flaky skin and poor complexion. Cucumber smooth out wrinkles and replenish the body with B vitamins, relieving the face of acne. The Queen of Egypt, Cleopatra, with her beauty, according to scientists, was obliged to regularly take cucumber juice, which helps moisturize the skin, supply it with microelements and vitamins, and keep it in tone.
Greenhouse do it yourself
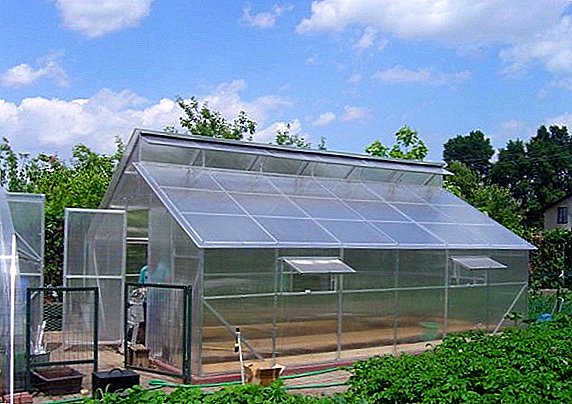
Mitlider’s traditional greenhouse with rather high walls and a roof of two slopes with his own hands, having drawings, as experience shows, if desired, anyone can. Six meters by three, twelve by six - the most common sizes of these greenhouses. The indisputable fact is that the larger the structure, the easier it is to observe the optimum temperature.
Did you know? Eating greenhouse tomatoes in spring can relieve spring blues. They contain serotonin - the “hormone of happiness”, which helps to fight against the melancholy state and improves the general mood. And also, psychologists are sure, the very red color of a tomato gives cheerfulness.
Tool list
"Mitlayderskaya greenhouse", assembled by hand, can have both a wooden and metal frame. Depending on this, before starting work you need to prepare a number of necessary and easy-to-use tools: clamps for window leaves, hinges, nails, screws, screwdrivers, saw, hammer, ordinary level, laser level, rope. When assembling a structure made from metal parts, one cannot do without some equipment, such as a drill, a Bulgarian, a welding machine.
Details and materials for the frame
The general structure of a polycarbonate greenhouse according to Mitlayder, indicating the location of individual parts, is as follows:  If it is decided to construct a greenhouse on the basis of a welded metal frame, then it is recommended to use pipes of two by two centimeters and four by four. The dimensional drawing of the greenhouse according to Mitlayder greatly simplifies the task. On the basis of metal parts of certain sizes, such separate structures of a structure are made by welding:
Butt with door (2 pcs.)  Details:
1. Two profiles measuring 4 * 4 with a length of 298 centimeters.
2. Eight profiles measuring 2 * 2 lengths of 198 centimeters.
3. Two profiles measuring 2 * 2 lengths of 298 centimeters.
4. Four profiles with a size of 2 * 2, 190 centimeters long.
5. Four profiles measuring 2 * 2 and 86 centimeters long.
6. Eight profiles measuring 2 * 2 40 centimeters long, cut at an angle of forty-five degrees.
Spacer (2 pcs.)  Details:
1. Two profiles measuring 4 * 4 with a length of 298 centimeters.
2. Six profiles with a size of 2 * 2 198 centimeters long.
3. Two profiles measuring 2 * 2 lengths of 298 centimeters.
6. Eight profiles measuring 2 * 2 40 centimeters long, cut at an angle of forty-five degrees.
Side wall (middle) (2 pcs.)  Details:
8. Two profiles measuring 2 * 2 with a length of 192 centimeters.
2. Four profiles measuring 2 * 2 lengths of 198 centimeters.
6. Eight profiles measuring 2 * 2 40 centimeters long, cut at an angle of forty-five degrees.
7. Two 4 * 4 profiles with a length of 192 centimeters.
Side wall (edges) (4 pcs.)  Details:
9. Four profiles measuring 2 * 2 with a length of 196 centimeters.
2. Eight profiles measuring 2 * 2 lengths of 198 centimeters.
6. Sixteen profiles measuring 2 * 2 40 centimeters long, cut at an angle of forty-five degrees.
7. Four 4 * 4 profiles with a length of 192 centimeters.
Roof end (2 + 2 pcs.)  Details:
3. Four profiles measuring 2 * 2 lengths of 298 centimeters.
12. Four profiles measuring 2 * 2 and 155 centimeters long, cut at nineteen degrees.
10. Four profiles measuring 2 * 2 and 187 centimeters long, cut at angles of thirty-three and a half and fifty-six and a half degrees.
11. Four 4 * 4 profiles with a length of 100 centimeters.
Other necessary parts for the manufacture of the roof:
12. Six profiles of size 2 * 2, 155 centimeters long, cut at an angle of nineteen degrees.
10. Six profiles measuring 2 * 2, 187 centimeters long, cut at angles of thirty-three and a half and fifty-six and a half degrees.
7. Six profiles 4 * 4 192 centimeters long.
9. Four profiles measuring 2 * 2 with a length of 196 centimeters.
8. Two profiles measuring 2 * 2 with a length of 192 centimeters.
Small window (3 pieces)  Details:
13. Six profiles with a size of 2 * 2, 190 centimeters long.
14. Six profiles of size 2 * 2, 40 centimeters long.
The following materials are needed to prepare the beds:
15. Eight parts measuring 2 * 2 length 196 centimeters.
16. Four pieces measuring 2 * 2 with a length of 146 centimeters.
17. Thirty parts measuring 2 * 2 lengths of 20 centimeters.
Greenhouse manufacturing
It is not difficult to build a greenhouse on the Mitlaider with your own hands from polycarbonate, but it is better to use a finished drawing with the provided dimensions, according to which the metal profile is cut. Then we start welding the parts, cleaning their ends before welding from burrs.
We start to cook from the bottom of the greenhouse and the side parts, reinforcing for greater reliability and stability of each detail by welded corners. At the same time you need to monitor compliance with the corners. All work is more convenient to perform on a flat surface.
Not only cucumbers and tomatoes are often grown in greenhouses, but also strawberries, peppers, and eggplants.
Next, you need to prepare a platform for the installation of the greenhouse frame, level the ground, put the foundation under the structure. At such a prepared place it will be convenient to weld the roof frame according to the scheme: 
It must be remembered that the rack 11 is welded inward in one of the two ends, and in the other two ends outward. The main thing when working on the roof frame is to set up exactly vertical posts that connect the upper and lower slopes with the base of the roof, and check the diagonals of the base rectangle. After that, you can weld all other parts, strengthen them with corners.
The frame is made of two or three identical parts, which are then connected to each other, it turns out a large roof for the whole greenhouse. The roof frame is ready. Of course, for the qualitative performance of this process, an assistant is needed who will help to measure, exhibit, check and hold the frame. After that, the roof can be moved to another place where it is painted, to mount window leaves in it and cover with polycarbonate.
While it is on the ground, it is more convenient to do it there than at the top. After the site has been freed from the roof frame, you can begin to cook the main frame, which will not move from its place. We install metal parts, welding them together on the spot. The main thing here is to correctly and precisely set the level of the perimeter of the structure. The bottom frame is ready, it can also be painted.
The whole essence of the uniqueness of the "mitlider greenhouse" is in the special construction of its roof and the presence of air vents in it for ventilation, when mounted, it will be optimal to use thermal actuators, which, depending on the air temperature, automatically open or close the window. After all operations with the roof are completed, four people will easily install it on the main frame, and it will be bolted to it.
After that, while the side parts are not covered with polycarbonate, you can already do the installation of the doors using the same thermal drive, decorating the beds with metal guides and planks, pour the fertile ground under the beds. And only at the very end to cover the rest of the greenhouse with polycarbonate. 
Important! In case of lack of welding skills, it is better to order the production of the metal frame of the greenhouse from specialists. This can be done where the profile was purchased; there they can cut it, weld all the necessary details according to the drawing, all that remains is to gather all of them together on the site.
Advantages of a mitliderovsky greenhouse
Greenhouse by Mitlayder conquered many with its simple genius, what are its advantages and are there any disadvantages? It would seem that everything is like in a familiar greenhouse, with the exception of one nuance - a split-level dual-roof roof with openings for ventilation. It is these windows that solve the perennial problem of greenhouse gardening lovers - the creation of excessive condensate, high humidity and moisture.
The unique principle of ventilation of this greenhouse helps to maintain the optimum ratio of temperature and humidity, and this helps plants to avoid many diseases and problems for vegetable growers, whose solution previously required significant additional costs associated with the purchase of tools for disease prevention and treatment.
Feedback on the greenhouse on Mitlayder extremely positive. Everything ingenious, as it turned out, is simple. And with sufficient and high-quality fertilizer, gardeners will not be able to rejoice in the harvest collected in these greenhouses.