Wallpapers - the most popular coating for walls and ceilings. Low cost, wide choice of colors, quick drying and safety determine high demand for them. The only question is the glueing process. How to do it correctly - we will talk about this further.
Wall preparation
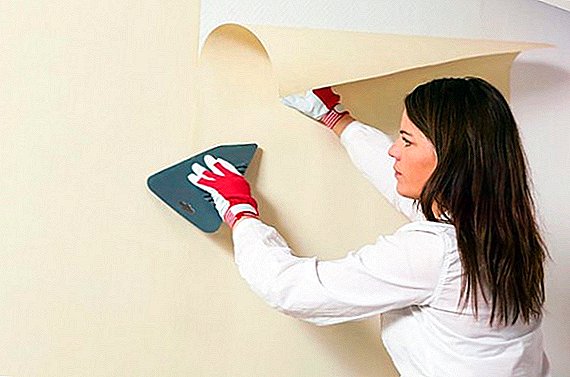
The first thing to start with is the preparation of the walls. They need to be cleaned of the old coating, if necessary, level and prime.
Cleaning the walls from the old coating
To glue new wallpapers on outdated paint or on previous wallpapers is not a good idea. The paint makes the surface smooth and poorly gluey. And the old wallpaper can peel off themselves from getting wet or the weight of new layers. Therefore, let's start by removing the old cover.
This action occurs according to the following scenario:
- turn off the electricity in the apartment;
- using a sponge / spray / wet cloth we moisten the old coating;
- leave for 10-15 minutes for better wetting;
- Using a spatula, gently peel off the remnants of the coating.

If necessary, repeat steps 2-4 until the walls are completely cleaned. Slightly more difficult to clean the walls, if they were previously painted.
In this case, you can use such methods:
- building hair dryer. With it, the paint heats up, softens and is removed with a spatula. The method is quite dangerous without proper preparation - it is necessary to organize good ventilation;
- grinder. With the help of nozzles, the wall is polished and the old layer is peeled off. This is quite a dusty way, so you need to open the windows, cover the floor and furniture with a film and caulk the cracks so that dust does not get there;
- washes. The easiest way is to treat all with special washers that effectively remove old paint. It should be remembered that work with such liquids is carried out using personal protective equipment and with open windows.
We recommend you read about how to remove the old paint from the walls.So, the walls appeared before us in their original form. But they may turn out to be uneven or, during the cleaning process, they may form chips and surface roughness. In this case, they must be leveled and plastered.

Putty walls
Puttying is carried out with special mixtures using spatulas of various sizes.
For this you will need:
- drill with nozzle mixer;
- bucket for stirring putty;
- a set of spatulas (from small to very large);
- the rule;
- level.
Depending on the condition of the walls, the putty is applied in several layers - one primary and one finishing. Putty can be combined with the alignment of the walls.
It will be useful for you to read about how to insulate the window frames for the winter with your own hands.
Wall leveling
Unfortunately, the walls in old houses, especially those built in the USSR, are almost always uneven. And very often the deviations from the vertical are quite significant. 
For such walls need to perform alignment. No matter how hard you try to glue and hide these irregularities, it will not work. All these protrusions, depressions and slopes will still be visible. The alignment of small flaws spend putty.
If the deviations are very serious and noticeable, it is better to use drywall or special foam. A more serious method is plastering beacons. It involves the complete removal of all layers of plaster and cleaning up the bricks. This is a more time consuming and lengthy procedure.
Primer walls
Primer walls should be performed in two stages.
- The first is that a special primer is applied before the putty to prevent the development of fungi and dampness.
- The second - just before work. It can be primed either with wallpaper glue diluted with water, or with a special primer mixture.

Now you can begin the process. But first we stock up on glue.
The choice of wallpaper glue
In modern stores, the choice of glue is quite varied. This is not surprising, considering that each type of wallpaper needs its own glue.
For light and paper suitable glue type CMC (based on carboxymethylcellulose) - this is an inexpensive option, there is in every store and will be very good to keep the coating. On sale there are brands such as Axton, Quelyd, PVA.
We advise you to read about how to build a cellar with ventilation, a sheepfold, a chicken coop, a veranda, and also to make a gazebo, garden swing, bench, pergola, barbecue, fence with your own hands.
For heavy wallpaper (vinyl or jute), vinyl glue with fungicide additives is suitable. It is made on the basis of modified starch, methylcellulose and various additives (fungicides, indicators). It will not only withstand the weight of the coating, but also protect the walls from mold and fungi.
When choosing, pay attention to the following brands: Quelyd VINIL SPECIAL, Metylan Vinyl, KLEO Smart Vinyl Line Premium. For non-woven coatings, choose a good adhesive with anti-mildew additives. Methylcellulose and starch are also the basis of this glue. For example, KLEO Extra Flizelinovy Line Premium, Metylan Flizelin Premium, Moment Flizelin. There is also a universal composition that is suitable for any basis. Only the layer will be different - the denser the wallpaper, the thicker it should be. Universal consider Bustilat, Moment-Classic.
Each major glue manufacturer (KLEO, Moment, Metylan, Quelyd) has its own line for each type of coating. They are usually called “Vinyl”, “Fiberglass”, “Flizelin”.
You can also prepare your own simple paste that will stand the most common paper coating. You will need 200 grams of wheat flour (preferably a lower grade) and 1 liter of water.
Then proceed according to the following scenario:
- Pour all the flour into the prepared dishes and add 200 g of water there. It should pour water into the flour, and not vice versa.

- Stir the ingredients until smooth.

- Pour the remaining water (800 g) into a saucepan and place on the stove.
- After boiling, slowly and gently pour the mixture of flour and water into boiling water, stirring constantly.

- Bring everything to a boil and remove from heat.
- After cooling, the paste is ready for use.


When buying glue, you also have to choose between dry and ready-made glue. Dry mixes are most widespread. They are diluted with water, easy to store, light in weight.
The finished composition can be recommended for beginners and in the case of a small pasting area. Manufacturers also produce glue with indicators (blue or pink) - this allows you to clearly see where it is applied.
Important! When choosing an adhesive, pay attention to the pH level. High pH (10 or more) will not leave yellow stains when drying and suitable for light wallpaper.
So, with the glue decided, it's time to get to work.
Features of the gluing process
Each type of coating requires special conditions and methods for sticking. Therefore, you should know how to glue these or other wallpaper. 
Paper wallpaper
The most common, cheap and simple look. For them, you can choose absolutely any glue, even homemade paste made from flour and water.
You will probably be interested in reading about how to choose a screwdriver.The process is as follows:
- cutting. First, the rolls are rolled down and cut into strips of the required length + 10 cm. If there is a pattern, it must be selected - on the rolls, the distance through which the pattern repeats is indicated. On such wallpaper there is an edge with one or two sides. When joining the joint to the joint, this edge must be removed; if it is glued with an overlap, it is not necessary to cut it;

- wall markings. For a perfect result, you need to mark the walls along the width of the roll. This is best done using a level (or plumb) and chalk. You can also use the grated chalk tracer - you need to pull and release;

- putting glue. Glue is carefully applied to the finished strips, spreading it neatly and evenly over the entire surface, especially paying attention to the edges. After that, the paper is rolled inward for 5 minutes for greater impregnation.


Important! The impregnation time should be the same for all bands. Otherwise there may be bubbles and distortions.
- glueing We begin to glue from the window, go into the room, from the light. We monitor the evenness of sticking and the coincidence of the pattern. We make allowances for the floor and ceiling. The strip is pressed and leveling with a dry cloth. Joints will need to be treated with a rubber roller - so they will be invisible.


Remnants of wallpaper on the ceiling and baseboard are clipped with a wallpaper knife. Need to finish above the door.
Non-woven wallpaper
To begin with, a wall is laid out under such a coating. With the help of level or tracer make vertical marks with an interval of 1 m.
Now carry out the preparation of wallpaper. Rolls are rolled and cut. They must be cut taking into account the features of the picture, selecting it if necessary. Cut consistently from one edge. It is best to do the cutting immediately to the whole room.
Glue coatings on non-woven base need special glue suitable for them, or following the recommendations of the coating manufacturer. Prepare the glue according to the instructions on the box. Before starting work, read the recommendations from the manufacturer. There is useful information on the performance of work.
Glue is applied only on the walls, the coating itself is coated in rare cases. Apply glue carefully, without leaving a gap, and a little more than the width of the roll width. During the work use the roller - so glue is applied evenly.
After applying the adhesive, the prepared strip is applied to the wall and leveled, starting from the top. This can be done with a roller or a dry cloth. Excess glue is squeezed to the side of the pasted place.
Press the wallpaper to the wall with a spatula and cut it off with a knife - this way we will keep a smooth cutting line. Remove excess glue from the ceiling and joints with a clean and dry cloth. Repeat the procedure.
Vinyl wallpapers
Gluing this canvas is not much different from paper:
- we make markings on the walls;
- we make strips of required length (plus 10 cm for stock);
- we smear the wall with glue;
- we glue the wallpaper, fold it for swelling, leave it for 5-7 minutes;
- glue start from the window from top to bottom;
- sticking on the strips, smoothing out the joints and removing excess glue;
- cut off the bottom and on the ceiling.

Important! We level the glued strips with a rubber roller. If you use a fabric - there is a chance to damage the vinyl layer.
Acrylic wallpaper
They are distinguished by a deep texture, but the principle of sticking is similar to vinyl.
In general, the sequence of actions is normal:
- wall markings;
- glue preparation (take the one recommended by the manufacturer);
- marking stripes on the height of the room (with an allowance of 10 cm);
- we spread glue on a ready strip, we fold it for swelling;
- we glue the wall;
- we apply a strip to the wall and smooth it;
- remove excess glue using a roller;
- repeat the steps for the next lane.
It is undesirable to use a spatula or a cloth for smoothing - they can spoil everything. 
Natural wallpapers
These wallpapers are made by hand by applying various materials to the base. As a basis use flizelin or paper. They are coated with fibers and threads of bamboo, jute, other plants, leaves, reed stalks, crumb of various stones and minerals. The main thing in this wallpaper is environmental friendliness.
Natural materials create certain difficulties in the use of such wall coverings. For them use either the glue specified by the manufacturer, or glue for acrylic wall-paper. If the materials are very heavy, then it is better to use "liquid nails".
- Cutting wallpaper is a hacksaw or scissors for metal.
- Applying glue is made with a brush, very carefully - it is unacceptable to hit the adhesive on the front side.
- Glue is applied to the strips and left to soak for 5-7 minutes.
- Marked stripes glue end-to-end glue down.
- Smoothing is carried out with a rubber roller.
Important! This type of coating can not be bent! To trim the corners, it is better to cut or decorate with a suitable decor.

Fiberglass wallpaper
They are made of glass and are most often intended for painting. The process of gluing them is simple.
- Prepare glue recommended by the manufacturer.
- Lay out the walls.
- Prepare strips of required length.
- Apply glue to the walls - on them, not on the wallpaper!
- Paste the strips to the seams.
- After drying, paint.
Textile wallpaper
Represent strips of cloth on paper or non-woven base. The procedure is not much different from pasting other types:
- wall markings;
- glue preparation (take the one recommended by the manufacturer);
- marking stripes on the height of the room (with an allowance of 10 cm);
- we smear glue on the finished strip, leave for three minutes;
Important! Do not fold the stripes - this will cause stripes on the fabric. It is also impossible to prevent glue from falling on the front side.
- if the wallpaper is made on the basis of non-woven, then we smear the wall with glue, not stripes
- we apply the strip to the wall and smooth it with a spatula or roller;
- next strip with glue back to back;
- remove excess glue using a roller;
- we cut off excess wallpaper from above and below;
- repeat the steps for the next lane.
Metallic wallpaper
This coating is a layer of foil applied to paper or interlining.
When working should take into account such moments:
- these wallpapers do not let moisture through, so the wall must either absorb it, or you need to use a special substrate;
- Before starting work, it is imperative to completely turn off the electricity.

The main works are carried out as standard:
- we make markings on the walls;
- we make strips of required length plus 10 cm for stock;
- if the base is non-woven - we smear the wall with glue;
- if the basis is paper - we smear the strips with glue, fold them for swelling, leave for 5-7 minutes;
- glue start from the window, from top to bottom;
- sticking on the strips, smoothing out the joints and removing excess glue;
- we cut the strip from the bottom and on the ceiling.
Liquid wallpaper
This is not really wallpaper in the literal sense of the word - it is rather plaster. Therefore, they are not glued, and put on the wall with a spatula and evenly rub with a float. First, prepare the solution by mixing in the tank with water all the components - first the decor, then the base and glue.
Stir everything by hand (a mixer can damage the fibers) and leave to swell for a while. The finished mixture is applied to the wall with your hands or a spatula, spread and carefully rubbed with a plastic float to the required thickness and color of the layer. 
Wall mural
The main difference and difficulty in working with them - a careful selection of the picture.
Otherwise, the steps remain the same:
- wall markings;
- glue preparation;
- strip preparation - trimming edges, cutting the desired length;
- glue smear on wallpaper and walls. Stripes rolled up for 5-7 minutes;
- apply a strip to the wall and smooth with a roller or spatula, but not with rags or hands;
- the next strip is applied to the right of the pasted, overlapped, with full alignment of the picture. The joint is carefully rolled;
- along the alignment line, an incision is made along the entire length of the strip. Place the joint is greased again with glue and smoothed with a roller;
- the procedure for the next band is repeated;
- After the whole room is plastered, it is necessary to apply protection against negative impacts on the photo wallpaper. To do this, use a water-based acrylic varnish. There is also the option of applying vinyl film, but it is better to entrust this matter to professionals.
Instructional tips
So, the procedures of gluing different types of wallpaper are clear to us. Now we learn how to properly perform these procedures and what points need to be taken into account in the work.
How to start
The most difficult thing in any business is the first step. In sticking wallpaper - this is gluing the first page. And in order for this step to be successful, it is necessary to glue, taking something vertical as the basis. Therefore, the work must begin from the window or door.
There is no particular difference between these options. But if you use a paper coating and glue it overlap, then you need to start from the window and go deep from the light - this will hide the seams.
Did you know? The first roll standard was mentioned in the decree of Louis XVI of 1778, which indicated the required roll length of 34 feet (10.4 m).
 Alternatively, you can start from the corner, but this will be associated with certain difficulties, since even angles are very rare. Therefore, this method is used in cases where other options are difficult to use and the vertical angle is beyond doubt.
How to glue in the corners, near doors and windows
The greatest difficulties arise when sticking up corners, windows and doors. No need to glue a whole strip into the corner - this is inconvenient, bubbles and folds are formed, the canvas will not stick as it should.
Therefore, you should prepare in advance for these operations. The corners should be leveled with putty. Calculate the width of the strip, which will be in the corner, so that no more than 3–4 cm would fit on the next wall.
In these calculations, take into account the irregularities of the angle - the stronger the curvature, the more allowance must be made. Using a spatula or brush, level and press the strip in the corner. If folds begin to appear, cut them and smooth them. Now go to the second wall.  It is necessary to make a markup for the strip on this wall.To do this, measure the distance from the angle equal to the width of the strip, minus 5-6 mm, and draw a vertical using the level. We start to glue, focusing on this line, and lead to the corner. If the wallpaper is high density and heavy, use a plumb bob when making corners.
How to glue on the ceiling
The process of gluing the ceiling will not be particularly difficult, subject to several rules:
- the ceiling must be prepared - cleaned of the old coating, leveled with putty or drywall, primed;
- glue must be prepared thicker than for walls. The heavier the wallpaper, the thicker the glue;
- Before you start, you need to mark the ceiling level and make a mark for orientation when gluing;
- cut strips along the length of the ceiling with an allowance of 8-10 cm;
- best to glue together;
- Smooth the strip with a roller or sponge. Glue excess glue with a cloth;
- To form a beautiful corner, first make a mark in the place where the walls meet. Then gently separate the strip and cut the excess fabric with scissors.
Pattern fits
Sometimes it is necessary to pick up a drawing, and only then begin work.
You can use two methods of selection:
- use two rolls. Cutting the strip from the first roll, spread it on the floor (you can immediately glue on the wall), take the second roll and select a new strip from the drawing. Cut it off and now select the pattern in the first roll;
- use one roll. Cutting the first strip, move the roll so as to combine the pattern on the strips. Cut the second lane and repeat the procedure. The disadvantage of this method is a large amount of waste, there may be about 1.5 m of scrap.
How to remove bubbles
If the gluing process is disturbed, bubbles may appear. If the wallpaper has not yet dried, then such a bubble can be removed by carefully smoothing the problem area with a roller or brush. While they are wet, such bloatings are inevitable - they disappear after drying, when the stripes "sit down".  If the bubble has not disappeared and remained on dry wallpaper, then you need to proceed as follows. Minor swellings are removed with a medical syringe. Gently poke the bubble, pull the air out. Then the space is also neatly filled with glue and smoothed, the excess glue is removed with a rag.
Large bubbles are a bigger problem. In such cases, an incision is made in the lower part with a sharp blade and the air is squeezed out with a roller or brush.
Again, fill the void with glue with a syringe, then smooth it downwards and wipe off the excess glue. But in this case, gaps may appear at the incision site, so we recommend that you first carry out such an operation in an inconspicuous location.
What to do if the seams on the wallpaper
Gaps between the stripes appear when errors in the preparation for the work - the wall is not primed, the wallpaper is very wet, or if the drying conditions are violated.  This is quite a serious problem, and in the event of large gaps, these places will have to be re-glued.
Did you know? For the first time in Europe, wallpaper created in rolls printer Hugo Goyce. It happened in 1509 in York. The printer has created a black and white imitation brocade. Now parts of this roll are stored in a museum in Cambridge. And the main supplier of wallpaper until the XIX century was China, where they were used since the II century.
In mild cases, you can do the following:
- for wallpaper for painting it is the easiest to do. It is enough to seal up the gaps with sealant and disguise it under the general tone, after which everything can be painted. Do not use putty instead of sealant, because it tends to crack and crumble;
- paper joints can be wetted with water and wait for them to swell. Then you need to gently tighten and leave for 5 minutes, then apply PVA glue and roll the joints with a roller.
If this did not happen, then it remains to decorate the joints or apply patches of scraps of the same wallpaper to them.
How to fold wallpaper plastered with glue
Wallpaper on a paper basis after applying the glue must be folded. Here's how to do it right. Visually divide the strip into three parts, fold the top in half, the lower two thirds also fold in half. Thus, we do not mix up and down. It turns out approximately what you see in the picture below.
Crop Wallpaper in corners
When docking the wallpaper in the corners it is necessary to make a trimming. This is done with a sharp knife, spatula and plumb line. With the help of a plumb line is made, which will be done pruning.
Spatula tightly press the wallpaper to the corner and make a cut with a knife. In this case, we move only the spatula, the knife remains pressed - this way you can achieve a smooth cutting line. 
Trimming the ceiling and near the baseboards
This finish is also carried out with a spatula and a sharp knife. The spatula is folded exactly on the corner. Then with a knife we draw along the fold and cut off the excess wallpaper. Move the spatula and repeat the procedure.
How to glue wide wallpaper
The procedure for working with wide wallpaper is no different from the usual procedure. Nuances can be when finishing corners and other difficult places. To do this, it is necessary to prepare pre-cut strips of smaller width.
How to behave during the drying of the wallpaper
So, you have already finished all the work and pasted the last piece. The work is done. Now it remains to wait for drying. The drying time can be affected by such parameters as the material of the wall covering, the type and density of the glue, the type of wallpaper.
On average, all types of wallpaper dry for a day, provided that the normal humidity is observed, the temperature is not lower than + 17 ... +20 ° С and in the absence of drafts.  It is not worth artificially changing these parameters (for example, raising the temperature or reducing the humidity), because it will have a bad effect on the coating - paper will warp, wrinkles and bubbles will go.
The exception would be very dense wallpaper (metallized, vinyl) - you can work with them after 48 hours, but complete drying will come only in a week.
How to paste the arch wallpaper
Arches have become a frequent element of decoration in modern apartments. Therefore, they also often have to paste wallpaper.
Because of the peculiarities of the vault, it is not necessary to choose wallpaper with a pattern - it is practically impossible to achieve complete coincidence. It is necessary to give preference to a small pattern or plain wallpaper. It is better to use glue more dense - so that the strip is kept stronger on the arch.
Step by step it looks like this:
- when glueing the rest of the wall, calculate so that there remains about 25-30 cm of non-glued space to the edge of the arch. Spread this area with glue and leave to soak for 10-15 minutes;
- during this time prepare the strip;
- glue the finished strips onto the wall and cut out the contour of the arch with an indent of 2-3 cm;
- cut the edges in accordance with the arched corner with an interval of 3 cm. Fold them with your fingers and glue to the arch;
- Repeat the sequence for the other side of the arch.
 We are waiting for drying and proceed to the gluing of the arch:
- First, we prepare strips of slightly smaller width than the arch of the arch - by 3-4 mm;
- we coat the wall and the strip, wait for the wallpaper to swell and glue bottom-up;
- stripes should not be too long. The optimal length is up to the middle of the arch;
- we first glue the strip on one side, then on the other;
- joint at the central point.
After drying, the arch is ready for further decoration.
How to stick wallpaper, if they are stuck
And everything seems to be finished, everything has been done, but after drying or after a while you notice that some of the wallpaper has come off. And it is good if only joints that are easy to glue back have come off. But it happens that large pieces come off. Especially often this occurs in old houses, where the walls are whitewashed with lime. 
So, if the detachment is small:
- Prepare the glue, make it a little thinner than during the main works, or use ready-made glue;
- peel back the edges and clean wallpaper and wall from adhered debris;
- Glue it on and wait until the wall and wallpaper are soaked;
- press firmly, but rather roll the gluing area with a rubber roller;
- do not create drafts until the surface is completely dry.
A large piece is glued as follows:
- clean the wall and strip of wallpaper from debris;
- first glue the strip and leave to swell for 7-10 minutes;
- then smear the wall. Make sure that the glue does not fall on the front side of the wallpaper;
- carefully glue the strip to the wall and flatten it. Be extremely careful when straightening;
- press with a roller, spatula or brush.

As you can see, the process of wallpapering is not particularly difficult. It is enough to prepare well, stock up with all the necessary tools and carefully follow the manufacturer's instructions and our advice.