Dreams of a private pool are often visited by owners of country houses or country houses. Many people think that its construction is a rather time consuming, troublesome, financially expensive, requiring special equipment and equipment. However, it is quite possible with the minimum skills of construction work and the availability of some materials, to build a high-quality, inexpensive artificial reservoir in the country with their own hands.
Parameter Definition
The first thing to do before starting construction is to determine the shape and size of the pool. 
For this it is recommended to consider:
- the number of people for whom the reservoir capacity is calculated;
- pool appointment: for usual summer rest, for children, carrying out trainings, etc .;
- the size of the free land. It is impractical to build a large reservoir with a small plot.
As practice shows, the optimal width and length of the pool is 4 m, and its depth is up to 1.8 m.
Development of project documentation
In order to better understand all the subtleties of the construction of a reservoir: its size, shape, appearance, it is necessary to form a draft of the project, in which all norms and standards of SNiP regarding the design of similar objects should be observed.
Important! Experts strongly recommend to develop project documentation before the construction of the reservoir.

Creating a project is carried out in several steps:
- determination of the overall design, shape, size of the object, location of service devices, location of the water filtration system, the presence of technical equipment;
- conducting static calculations;
- the choice of the design of the bowl and the material of the base for its installation;
- construction of pool elements: fasteners, load-bearing elements, walls;
- selection of a protective coating, waterproofing, cladding.
During the operation of the reservoir, it is the bowl that is susceptible to the greatest surface loads. Therefore, with the slightest mistakes in the design, it can be subjected to deformations, the appearance of cracks, and, as a consequence, a rapid failure.
It will also be useful for you to learn how to install a sectional door with your own hands, how to properly sheathe the door, how to install the air conditioner correctly, how to sheathe the walls with drywall, how to make a blind area with your own hands, how to make concrete walkways with your own hands, how to build a veranda to the house.
The final stage in the development of the project is the manufacture of a communication scheme: the design of drainage systems, heating, ventilation systems, electrical supply. 
Site selection and territory marking
The construction of the pool with their own hands, above all, involves choosing the right place.
For future construction should choose the area corresponding to such parameters:
- good illumination, sunny place (water will warm up well);
- comfortable location at the highest level of the site, then it will be possible to do without installing additional drainage devices;
- remoteness from the garden, vegetable garden, large plantations, it will allow to protect the building from falling leaves, fruits, branches;
- proximity to communications.
Preference should be given to clay soil, which will keep the pool water at the same level. 
After choosing a place, you should proceed to marking the territory, armed with a tape measure, drawstring and wooden pegs.
Important! The size of the site on which construction will be carried out should be 0.3-0.5 m larger than the parameters of the future basin, from all sides.To mark the boundaries of the construction site, you need to drive pegs into the ground and pull the string around the perimeter.
Digging pit
Digging of the pit is the fourth, one of the most basic, stages of construction work.
If you plan a small and compact pool, then digging can be done on your own, otherwise special equipment is indispensable. 
The device of the pit is carried out according to this algorithm:
- The top fertile soil layer is completely removed.
- Layout of the pit: it is performed using a regular edging board. Boards set around the perimeter of the future pit in the shape of a rectangle. Be sure to verify the installation, by measuring the diagonals, which should be identical. The size of the pit is supposed to be 20-30 cm larger around the perimeter of the size of the bowl. This is necessary in order to be able to equip a pillow under the materials and mark the technical equipment.
- Digging the walls. At this stage, carefully make sure that the walls of the pit were slightly inclined relative to the vertical by about 20-25 degrees. This will avoid falling of the ground into an already dug trench.
- Drainage holes. When performing work, you need to provide a place for the flow of water that will be splashed out of the pool. Such a measure would eliminate the formation of puddles and swamps near the reservoir.
- Draining. To organize the possibility of draining water from the tank, it is necessary to make a slope at the bottom of 5-7 °, which will be directed towards the drain hole.

Leveling the walls and tamping the bottom
After the deepening of the required parameters has been dug, the walls should be carefully leveled, while not forgetting about the angle of inclination. The evenness of the walls is checked by plumb. Next stage - pillow shaping and tamping.
You may also be interested to learn how to make a fence with your own hands: from brick, from picket fence, from chain-link mesh, from gabions, woven wooden, and roof: from metal tile, gable roof, roof roof, how to cover with indin.To do this, at the bottom of the pit fall asleep:
- the first layer is sand 15 cm;
- the second layer is crushed stone 15 cm.
Did you know? In Italy, the deepest pool in the world has been built, it is trained in scuba diving, and its depth is 42.15 m.
For tamping the pillow, the surface is poured over with water and after it is fully absorbed, sand is leveled with a rake. It is important to ensure that the base is absolutely level.  The construction of the basin implies the presence of external and internal waterproofing, which is carried out at the same stage of work. As a waterproofing material, roofing material or geotextiles are perfect.whose sheets are laid on the bottom in several layers.
Such events will not only prevent the contact of materials with groundwater, but will also serve as a barrier against weed germination, protect against the negative effects of worms, beetles, etc.
Laying drain / bulk communications
Any type of pool will not be able to fully function without communications.
The optimal construction of communications consists of three pipes:
- drain. Designed to drain all the water from the pool;
- overflow Serves to drain excess water. It is welded to the drain pipe at a short distance from the drain hole. It is recommended that the overflow pipe be concreted into the wall and brought to the surface at the required level;
- bulk. Mounted slightly above the water level, intended for pouring water into the pool. Also mounted on the pipe crane in a place that will be easy to reach.
How to make a pool in the country with their own hands: video
It is recommended to treat the entire pipe system with an anti-corrosion agent.
Important! It is better to install the communications system without knees on the pipes. Their absence will prevent stagnation and clogging of water, which adversely affects the condition of the pipes.
Bowl construction
Now go directly to the construction of the bowl.
Building a monolithic frame
The first step in the formation of a monolithic frame is laying reinforcement. To do this, metal rods are installed around the perimeter in the pit, the distance between which is about 20 cm. At the same time, it must be ensured that there is 5 cm between the reinforcement and the edges of the basin.
For the formation of the frame using reinforcing ribbed rods with a diameter of 10-14 mm. From the edge of the slab, it is necessary to bend the reinforcement with the letter “G”, so that in future it will be possible to form the framework for the walls. 
Formwork installation
Before concreting, a small formwork should be assembled, the design of which should clearly outline the parameters of the future object. To create the formwork in most cases using a wooden board or plywood.
The latter allows you to create bent shape, so that the surface of the bowl is almost perfect.
To prevent the deformation of the formwork, the installation of stiffeners and struts from a timber section of 50x50.
In the middle of the formwork establish two levels of reinforcement according to this principle:
- the first level should be 5 cm higher from the edges of the plate;
- the second is below the edges.

The distance between the reinforcement layers should be about 10 cm.
Important! For heavy overall pools, a more reliable and durable reinforcing frame should be formed.
The formwork for steps is mounted separately from the main one, after the bowl is already fully prepared.
Concreting
Concreting mixes can be purchased in specialized stores or made independently using sand, cement and special additives.
Ideally, the pool bowl is poured at the same time. However, it is difficult for a non-professional to do this on their own. 
Therefore, concreting is carried out in stages:
- Concreting the bottom with a slope of several degrees in the direction of the drain. To ensure durability during pouring, it is recommended to use a vibration unit that will compact the mixture.
- Concreting the walls. The solution is poured very carefully and slowly, paying particular attention to filling the voids between the formwork and the walls of the pit. If the weather is hot outside, it is necessary for 2 weeks, until the solution hardens completely and becomes strong, wet the surface several times a day.
One month after pouring the concrete, you can proceed to the arrangement and lining of the pool. 
Wall and bottom decoration
Finishing the pool involves a set of activities:
- Plaster surfaces. For such work will require materials: cement, sand and water. To increase the strength of the antifungal and anti-mold properties of the solution, appropriate latex fillers are added to it. It is also possible to use specialized mixtures for plastering pool walls, which have the same characteristics as homemade mortar.
- Grinding. After the plastered surfaces dry out, they are polished by hand or using a grinding machine.
- Applying a liquid waterproofing. A liquid waterproofing solution is applied on the plastered and ground walls, between which layers a reinforcing mesh is laid. When performing such work, special attention should be paid to the seams between the bottom and the frame of the reservoir, places of laying of communications, cracks, possible chipping or recesses.

Important! After applying a waterproofing it is checked for quality. For this pool filled with water and measure the water level. Wait 7-10 days and re-take measurements. The stability of this parameter indicates the correct and high-quality implementation of moisture insulation.
Various materials can be used for finishing the decorative walls and the bottom of the structure:
- ceramic tiles or multi-colored mosaic;
- polyvinyl chloride film (the most economical option);
- tile.
When choosing a veneer, experts recommend taking into account such parameters as accessibility, the possibility of replacement, ease of installation, simplicity of maintenance, attractive design. 
Equipment installation
The very last turn is the installation of equipment. What equipment is needed - the pool owners decide. As a rule, the required attributes are steel ladder and handrails.
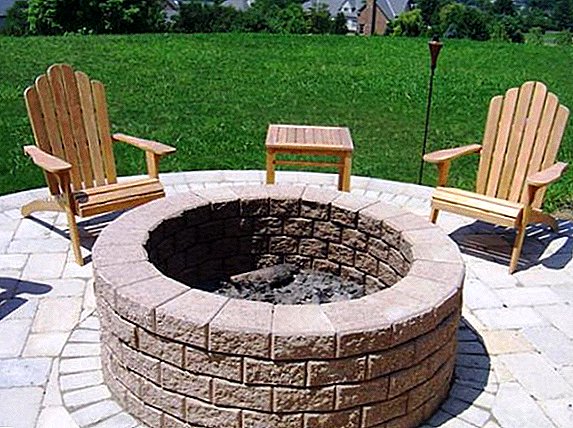
An important aspect, from the point of view of aesthetics, is the arrangement of the area near an artificial reservoir. Flower beds, paths, beautiful ornamental lawns, landscape designs, etc. are organized.
To decorate your summer cottage, learn how to do yourself a trellis for grapes, a dry stream, rock arias, a bed of stones, a rose garden, a fountain, a garden swing, a decorative waterfall.
How to care for the pool
The basis for caring for a home pool is to keep it clean and to conduct timely, regular cleaning and disinfection of water.
Water, especially if it is under constant influence of climatic phenomena - sun, rain, wind - is a fertile environment for the reproduction of bacteria and microorganisms, which leads to pollution of the basin and the loss of its attractiveness.  It is recommended to use running water for filling the reservoir, since it is cleaner and safer than lake or river water.
Cleaning the pool can be done in a mechanized way - with a net, brush or water pump, or you can use special filter systems that will trap dirt.
Did you know? Pools were very popular in ancient Rome. Of course, they differed significantly from modern ones, for example, their walls were laid out of stone blocks, which were treated with resin for waterproofing purposes.
Several times in the summer time you should completely drain the water, rinse the surface (walls and bottom) of the pool with disinfectants. The main indicator of water quality is considered the balance of acid-base environment. Ideally, it should be 7-7.4.  Among the drugs that are used in the care of the reservoir, are effective tablets based on chlorine. There are tools used to impart transparency to the water, and there are universal, which perform disinfection, cleaning and disinfection. Algaecides are excellent for fighting flowering.
Caring for an artificial reservoir is carried out throughout the entire period of its operation. Moreover, all the above activities should be carried out in a complex, only then a positive result will be obtained.
Swimming in your own summer cottage is not a dream, but just a matter of time and minimal effort. Armed with some knowledge, necessary building materials and tools, it is possible in a fairly short time to build a beautiful reservoir that will delight its owners for more than one summer.
Feedback from network users