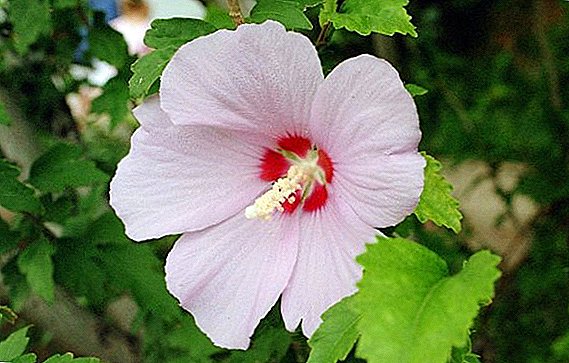
Garden hibiscus is a real decoration of any plot. Unpretentious in the care, he will delight the owner with his exotic flowers for years.
Hibiscus reproduces most often - cuttings and seeds. These methods are effective, simple: even a novice grower can handle them.
The article will look at how to prepare the soil and choose a place for planting, how to root the cuttings, and also how to care for a tree or grass plant planted in open ground.
Also analyze the possible problems during cultivation.
The best time to breed
The choice of time of the year depends on the method of reproduction. So, seeding is carried out from January to March. During the winter and spring shoots will grow, gain strength, strengthen. In open ground, seedlings are planted in mid-May. Cuttings are cut from April to August.
The most favorable month is May: the plant is full of vitality, it is actively developing, the air temperature is quite high, but there is still no summer heat, plenty of soft sunlight. Over the summer, seedlings will be able to settle down and grow stronger.
Soil preparation and site selection
 Land.
Land. For sowing seeds and rooting a garden hibiscus stem, a peat-based substrate will be suitable:
- a mixture of peat and moss - sphagnum;
- a mixture of peat and perlite;
- a mixture of garden soil, peat, coarse sand in equal proportions.
For the cultivation of hibiscus in the open field also need a light and permeable soil rich in organic matter. For example, turf, leaf soil, humus, coarse sand in a ratio of 2: 2: 1: 1. As an option: 5% perlite, 45% bark from hardwood, 50% peat.
- A place.
The best place for hibiscus garden in the area - penumbra, it does not tolerate direct bright sunlight. But you can not put him in absolute shadow. Also the place should be protected from drafts.
 Land.
Land. How to plant seeds?
Seed method makes it possible to get a flowering plant only after 3 years. First you need to collect and prepare the seeds. After the hibiscus has faded, the pods containing seeds begin to ripen. The rate of ripening - the pods begin to turn brown. At any moment they can open up and fall to the ground.
Before collecting the seeds, the plant should be lined with material or paper to prevent them from spilling. Before sowing, seeds should be soaked for 10 hours in a growth promoter.
Step by step landing instructions:
- Prepare what you need for sowing: container, substrate, drainage (expanded clay, pebbles, broken brick), seeds, a spray with water, glass or plastic film.
- The bottom of the container is filled with drainage, then - a layer of soil.
- Soil should be well moistened.
- Seeds are distributed over the surface at a distance of 0.5 cm from each other, and a thin layer of substrate is sprinkled on top, so that the seeds are 5 mm deep.
- Liberally moisten the top layer of the spray bottle.
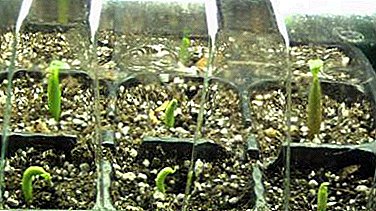 The pot is covered with glass or polyethylene, placed in a warm, bright place, but without direct sunlight. Recommended temperature of keeping is + 25С - + 27С. The first shoots will appear in 2 - 3 weeks.
- It is necessary to maintain constant humidity in the greenhouse, do not forget to air it and regularly spray seeds and soil.
- When the seedlings have the first leaves, they need to be seated in individual pots.
- In mid-May, seedlings are planted in open ground.
 The pot is covered with glass or polyethylene, placed in a warm, bright place, but without direct sunlight. Recommended temperature of keeping is + 25С - + 27С. The first shoots will appear in 2 - 3 weeks.
Important! The method of propagation of garden hibiscus seeds will not guarantee the preservation of all characteristics (color, variegation) of the parent plant. Save all the characteristics is possible only with the propagation of plants by cuttings.
How to propagate cuttings?
The method of propagation by cuttings is a favorite among flower growers, it is suitable for both tree and grass hibiscus. The stalk will give roots in a month and a halfand the plant, grown from cuttings, will bloom a year after rooting.
For grafting, it is necessary to cut a young, semi-lignified shoot from the top of the bush (10-15 cm long, 2 to 3 internodes must be on it), cut it from the mother plant diagonally with a clean knife or shears, remove the lower leaves, and cut the upper leaves by half . The top of the shoot is shortened with a straight cut.
Rooting in water
Step by step landing instructions:
- Prepare everything you need: a container made of dark plastic or glass, a cutting, an activated carbon tablet, some growth stimulant, a greenhouse.
- Capacity to fill the distilled water at room temperature (2/3).
- Add an activated carbon tablet to the water and dissolve the root formation stimulator in it.
- Put the cutting in the water.
- Above the escape tank must be covered with a greenhouse.
- Place the vessel in a warm (+ 20С - + 25С) and bright place (but without direct sunlight).
- Sometimes a greenhouse needs to be opened, shaking off a drop of condensate from its walls so that rotting processes do not start.
- After the roots grow to 2 - 3 cm, they can be planted in the ground.
Reference. If there is no mini-greenhouse, then it can be made from a plastic bottle by cutting it. A plastic bag is also suitable, which is recommended to be tightened with an elastic to maintain a high level of moisture. You can also use conventional plastic food containers, but first you need to make sure that the lid fits tightly to the container.
Rooting in the ground
 Step by step landing instructions:
- Prepare everything you need: a container (200 - 500ml, there must be a drainage hole), drainage (expanded clay, pebbles, broken brick), substrate, cutting, root formation stimulator, pencil (wooden stick), watering can with water.
- The bottom of the pot should be filled with expanded clay (2–3 cm), the rest of the volume should be filled with substrate.
- Soil plenty of water. Give time to drain the water.
- Using a pencil or a stick, make a recess of 3-5 cm in the substrate.
- Sleep in the recess ½ tsp. rooting stimulator.
- Lower the groove into the recess.
- Sprinkle it with substrate and apply it for better fixation.
- Cover the top with a mini - greenhouse.
- Place the vessel in a warm (+ 20С - + 25С) and bright place (but without direct sunlight).
- Systematically a greenhouse needs to be opened, shaking off a drop of condensate from its walls.
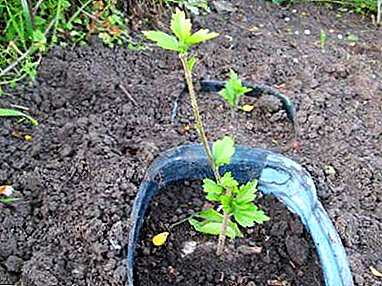
- After about 1.5 months, the stalk will release the roots, and it can be transplanted into the open ground using the transshipment method. But it will still be better if the plant spends the first winter indoors.
How to care for a tree or grass plant planted in open ground?
How to grow hibiscus after planting in open ground, so that it becomes a garden decoration? After the garden hibiscus was planted on the site, it is necessary to provide care as an adult plant. Systematic loosening of the topsoil, removal of weeds, regular watering (in hot and dry summer watering should be daily) - this is what the plant needs.
Twice a month, from June to September, garden hibiscus should be fed with fertilizers with a high content of nitrogen and phosphorus., and in the fall - fertilizers with potassium. Do not forget about regular pruning.
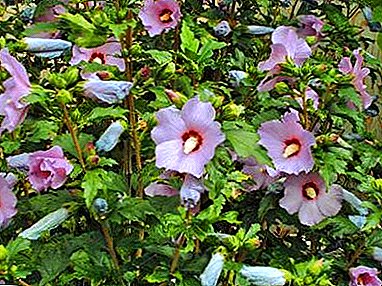
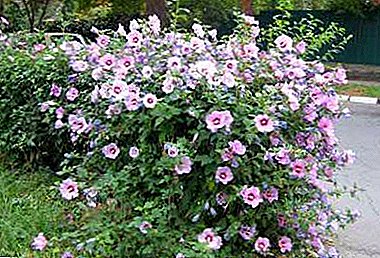
A photo
Check out the photos of the amazing hibiscus garden, for which proper care is provided:


Possible problems with growing
- Rooted stalk fades after transplanting into the ground.
When planting a young plant, its root system was disrupted. Hibiscus will have to be cut again, since there is practically no chance of survival for such a cutting. It is possible to prevent such a phenomenon if the transplanting is done by transferring the plant: remove the plant from the old pot and, without brushing off the earthen clod, place it in the earthen hole.
- The plant did not bloom in the expected time.For systematic and abundant flowering garden hibiscus need regular pruning.
- The young garden hibiscus shows signs of infectious diseases (decay, powdery spots, etc.). For the prevention of this phenomenon, it is recommended to disinfect the soil, the pot into which the cuttings will be planted (fungicide treatment, heat treatment). You can also seed, before dunk in a solution of growth stimulant, briefly immerse in a weak solution of potassium permanganate.
The two breeding methods discussed in the article are simple and reliable. The choice of one of them is a matter of taste, desire, and possibilities of the gardener. But in any case, the dacha will decorate with a young, unpretentious, flowering plant.