Any comfortable housing is unthinkable without communications and wiring. With some malfunctions in the operation of various home appliances and equipment, you can repair them yourself, without resorting to the obligatory help of specialists. In this article, we will look at how to properly insert switches and sockets into the walls of your house - what place for this to choose, what tools do you need and what is the sequence of works.
The principle of operation of the switch
In our modern world it is difficult to imagine a room in which there is no switch. This is often a small plastic box with a metal filling and one or two keys that act as a connector or disconnector for an electrical circuit. In the on position, they connect the power line from the shield to the chandelier, and in the off position, break the circuit, stopping the flow of current through the wires. 
The principles of operation of the switches are quite simple. To light a light bulb, two cables are brought to its base, called phase and zero. From the distribution box towards the switch, only the phase moves. Here it is branched into two cables, one of which is laid from the box to the switch installation point, and the second is carried from the switch to the lamp itself. Thanks to the key switch, the phase cables are hooked up and disengaged.
Did you know? The first data on people who received electric shocks were found in ancient Egyptian texts dated 2750 BC. All because of fish, in particular, electric catfish, capable of producing current pulses up to 360 volts.

Choosing a place
In the recent past there was a tendency to install switches at the level of a person’s eyes so that you can see where to turn on and off. Today, basically use the rule of the level of the hand for greater convenience when changing the position of the keys. Also, the switches try to hide from the field of view as much as possible, as well as sockets, so as not to spoil the appearance of the walls.
With the onset of cold weather, the thermal preservation of the room begins to trouble us. Learn how to insulate the window frames for the winter with their own hands.In general, there are no special requirements for the location of the circuit breaker, its position relative to the windows, doors, floor and ceiling. The main thing is to make it convenient and comfortable for you to use it.

In accordance with modern trends in design and improvement, the switch is located at a height of about one meter from the floor and close to the door so that you can turn on the light immediately upon entering the room.
If we talk about sockets, then they need to be located at the same level relative to the floor and walls, but on different walls. The best option to do one outlet on each wall or place them as required by the number and location of future electrical engineering. 
Necessary tools and preparatory work
Before you start drilling the walls and drilling the space for the switch, you need to take inventory of the tools at hand, so that during the work there are no unexpected troubles like what a drill is, and there is no special nozzle for drilling round holes in the wall. So, your arsenal of tools should include:
- perforator with a drill with a diameter of 6 mm;
- dowels;
- punched tape;
- nails 6x40;
- PVC pipe (corrugated or plain);
- cable of the desired section;
- nozzle on the punch or drill for drilling round holes;
- switches for the right amount;
- sockets for the right amount;
- level (normal or laser) for marking wiring, sockets and switches.

After you prepare all the necessary tools and check their equipment and performance, you should make sure which of the incoming wires supply voltage, and which does not.
Important! After determining the cable under voltage using a special device, it is necessary to de-energize the apartment from electricity by turning off the toggle switches in the switchboard. Do not neglect this important rule in order to avoid irreparable consequences and injuries.
Cabling
Cable laying can be started only after all the preparatory work has been completed, including one of the main steps in the preparation of the working surface. To choose the right cable thickness, you can follow the rule: 1 square millimeter cable withstands the maximum voltage of 1.5 kW. It is necessary to drill carefully, without haste, periodically stopping and checking whether the direction has not gone down. It is also worth splitting the planned work into parts to give the punch time to cool down, as well as give yourself a break. 
Work surface preparation
Before laying the cable, it is necessary to carry out marking work and determine with the help of the level where the cable grooves will be located, as well as mark the location of sockets and switches. Only then can you begin to clean the working surface to concrete. You need to remove the plaster, wallpaper and other decorative materials from the walls before you start the punch. Since you still sprayed, no need to process the walls with a layer of soil mixture. Now you can proceed to the preparation of the wiring itself for further installation and installation.
If you are planning to paint the walls, familiarize yourself with the methods for removing old paint from the walls of different materials.
Post preparation
To ensure that the cable is laid in the correct and most secure way, it is necessary to prepare special protective PVC tubes (corrugated or ordinary) into the strokes made. They will act as defenders of the cable surface from sharp corners, and especially at the places of bends, where the danger of chafing and damage to a thin cable is most significant. 
Thread the cable into the prepared PVC pipe, and then put them in the gate.
Important! For successful installation of sockets and switches, you must leave at least 10 centimeters of free cable. If we are talking about installing the electrical panel, then the supply of free cable should be about 1 meter.In order to strengthen the tube with a cable in the wall, you need to prepare special holes approximately 30 centimeters apart from each other. In these holes, drive in special dowel-nails which reinforce the punched tape. This tape will keep the tube in place, preventing it from moving. Simply wrap a corrugated or ordinary PVC pipe with a cable in a punched tape and repeat the same operation around the entire perimeter of the wiring.

Also at this stage, you need to install special podozetniki. To do this, select the wall with a round nozzle on the perforator, then run the cables into the corresponding holes of the plastic socket, and then further strengthen the socket in the recess with screws.
Transition terminals are placed in cases where it is necessary to perform a high-quality connection of two or more cables. In order to install the transition terminal, you need to make a preliminary stripping of the cable from the braid. To do this, the usual knife or stationery. Carefully strip the braid at the end of the wire about 1-2 centimeters. Next, insert the wires to connect the wires on both sides, then clamp the ends with a bolt. 
How to connect the wires
After the wiring has been done, it is necessary to proceed to the next stage of the installation of electrical equipment, which consists in connecting it to the electrical lines coming to the house.
In order to achieve maximum installation results, you should use your imagination and imagine that the wires became "pipes" and the electric current turned into "water". A “water supply” takes place along the line of the phase cable, the “return flow” is returned via the zero cable, and the protective conductor is created to the foreseen emergency variant, for example, if a leakage is detected in some place, the “water” will certainly be drained into the earth.
Due to the technical progress today, wires are painted in different colors, which is very convenient for a beginner in electrical wiring.
Did you know? One of the most common colors has the following color range: white - phase (L), blue - zero (N), yellow-green - ground (PE).When performing electrical work, you must clearly perform and observe the sequence of colors of the cables in order to significantly facilitate the task of carrying them out in the junction box. For the convenience of future use, maintenance and repair work, it is recommended to pre-mark those points in which such distribution boxes will be installed, where wires from all points of lighting, sockets and switches will be assembled.

Installation of the switch mechanism
And now, finally, you got to the time of installation of the switch mechanism. Basically, the following step-by-step scheme is used in the assembly and installation of the switch:
1. De-energize the phase, then remove the keys from the subframe. Under them are two mounting screws, which are the connectors of the front part of the switch with their electronic mechanism. Unscrew both screws and disconnect the subframe and the working element of the fixture.
2. Now you have to disassemble the screw mount, which serves as a clamp wire inside the mechanism.
3. Strip the braid on the wires, leaving about 1-2 centimeters of each cable clean.
4. Insert the wires into the mount so that its bare fragment barely protrudes outside the structure (approximately 1 mm).
5. Tighten the screw fasteners, which tightly fix the contacts. Then pull the wires a little to check the strength of the fastening. It is important here that the ends of the wires cannot move freely. But also not worth it and drag fasteners, because you can disrupt the thread or crumble fragile plastic.
6. Insert the switch mechanism in a pre-secured sub seat, guided by a strict horizontal position.
7. Using special spacers fix the working element of the switch, screwing in the screw fasteners that regulate them. Check the reliability of the built-in switch.
8. Now apply a protective subframe to the structure and strengthen it with special screw clips.
9. Arrange the keys and check their performance. 
At this installation of the switch is completed. You can turn on the electricity and check its functions in practice.
Important! On the back side of the functional mechanism on the switches, the places of the incoming and outgoing contacts are marked with certain symbols. For example, the input may be denoted by 1 or the letter of the Latin alphabet L, the socket of the outgoing cable is marked with the numbers 3, 1 (if the input is denoted by L) or an arrow.
Latch fixing
The cover plate is fixed using special screw fasteners or simply pressed against the switch subframe to the wall. As a rule, the second type of overlays is more common. But such a device was popular in Soviet times and rarely used in the modern world. 
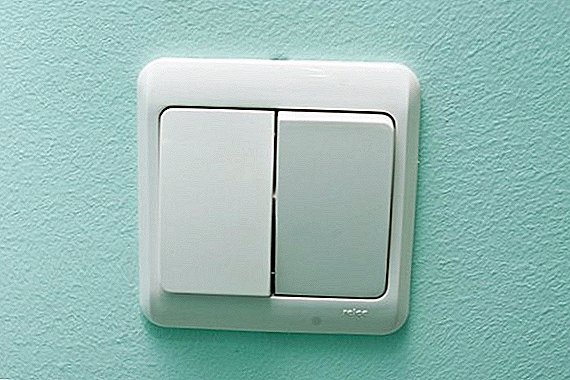
Features of the installation of dual switches
The device with double keys are used in large rooms where there is a massive chandelier with a large number of light bulbs or just a lot of lamps. Also this type of switch is used in separate bathrooms, when one key turns on and off the light in the bathroom, and the other performs the same operations in the toilet.
There are no special differences between single-key and dual switches. The main difference lies in the fact that three phase cables come to the two-button switch: input cable and two branch cables. In this case, only the input is energized. 
Did you know? Lightning is one of the most powerful natural electricity providers. Our distant ancestors believed that the lightning that struck a particular area was a pointer to a water source and that it was in this place that it would be better to dig a well.Sometimes it is difficult to immediately understand which of the slots one wire should be inserted into. But when it comes to practice, this complexity is not at all. The main guideline in the proper installation of such a switch is a screw, which is located on the front side of the mechanism. It is under him and you need to start the cable that is phase and will supply electricity. Two lower slots were provided for the two de-energized phases. The more modern devices, which are an order of magnitude higher in quality and, accordingly, in price, have the following designations on the back of the switch by manufacturers:
- when it comes to numeric characters only, then 1 is the power cord, and 2 and 3 are lead wires;
- if there are L, 1 and 2 or L signs and two arrows on the mechanism, then the power supply cable is connected to L, the others are outgoing.
 Otherwise, this option of the switch is in many respects identical and is no different in assembly and installation from the single-key device.
Now you know all the details of the process of wiring and installation of switches. The main rules of success of this event are consistency and accuracy in the implementation of each stage. Take the time not to confuse the phases or damage the components themselves, otherwise they will have to be bought and replaced. Guided by the recommendations in this article, you can easily replace or install a new switch, and the process itself will no longer scare you with its uncertainty.